
|
|

|
|
|
|
Welcome to the Australian Ford Forums forum. You are currently viewing our boards as a guest which gives you limited access to view most discussions and inserts advertising. By joining our free community you will have access to post topics, communicate privately with other members, respond to polls, upload content and access many other special features without post based advertising banners. Registration is simple and absolutely free so please, join our community today! If you have any problems with the registration process or your account login, please contact us. Please Note: All new registrations go through a manual approval queue to keep spammers out. This is checked twice each day so there will be a delay before your registration is activated. |
|
|||||||
 |
|
|
Thread Tools | Display Modes |
 05-09-2009, 12:22 AM
|
#1 | ||
|
Regular Member

Join Date: Mar 2007
Location: Sydney
Posts: 340
|
Ring Ring....... Ring Ring........ Ring ....
Yea ellooow Im bringing my coupe around for you to fix! No Noo Noooo Noooooooo Nooooooooooo The parcel shelf and rear panel are good it wont take long to paint. Here are the pics. of the old girl. Should of sent it to the scrap metal yard  |
||

|

|
|
05-09-2009, 12:39 AM
|
#2 | ||
|
FF.Com.Au Hardcore

Join Date: May 2005
Location: In my shed
Posts: 5,066
|
Was this the one on ebay a little while ago?
I think the seller had a Wild plum one as well. |
||
|
|
|
|
05-09-2009, 12:49 AM
|
#3 | ||
|
Regular Member
Join Date: Mar 2007
Location: Sydney
Posts: 340
|
Roof is stripped of paint but there is surface rust real deep in a couple of places so the rust remover is put to work.
Roof gutters are to be removed left side is full of holes. Both sill panels are to be removed and replaced with replica panels. When is someone going to make cheap full size sill panels for these coupes as they all rust under the front guards. Inner sill panel painted with zinc primer before the sill panel is welded back on. The coupes original colour under the blue?rust? is Wild Violet Was a 6 cylinder and white trim from the factory. Now has a 351 and top loader and disc brake rear end. |
||
|
|
|
|
05-09-2009, 12:01 PM
|
#4 | ||
|
Legend!!!

Join Date: Jun 2007
Posts: 907
|
Geez you have got a bit of work ahead of you.
The body looks pretty straight though. Whats the phlenum chamber like? I noticed it has the handbrake lever in the centre, Do you know what its off? Im looking at fitting one from a magna in our coupe. Wont be done in time for Echuca though. It will be great for drifting the Ol Whale  Keep us posted of the work as it progresses, Its always good to see the different ways people tackle the rust repairs on these beasts. Cheers Jack
__________________
BARE BONES RACING BACK TO THE BONE YARD |
||
|
|
|
|
06-09-2009, 05:10 PM
|
#5 | ||
|
Regular Member
Join Date: Mar 2007
Location: Sydney
Posts: 340
|
So that is why you guys put the hand brake in the middle where the console should be.
Plenum chamber has been repaired before but was cut open again to do a couple of minor leaks. Its all good now. The owner has found his calling in life ......... repairing XA coupes that should of been sent to the junk yard. Another one saved forever from the scrap yard he says. He is quite content to spend a few hours every day with the mig welder welding in rust patches. My mig welder is a synergic pulse mig and I am using copper silicon .8 wire, argon shielding gas. This is superior to using normal steel mig wire, as not as much heat needs to go into the panels to weld. Clean up is easy as the copper grinds off a lot faster because it is softer material. The welds generally lay flatter as the copper silicon flows better. Less clean up time. This wire is not cheap around the $300 for a roll. I do all the more technical work like replacing sill panels, boot channel gutters, body filler, door gaps etc. The best tool for removing rust and old paint in hard to get places is the angle grinder with the wire wheel it absolutely rips!! Did I mention this is a budget build up 
Last edited by Jallopy; 06-09-2009 at 05:26 PM. |
||
|
|
|
|
09-09-2009, 01:10 AM
|
#6 | ||
|
Regular Member
Join Date: Mar 2007
Location: Sydney
Posts: 340
|
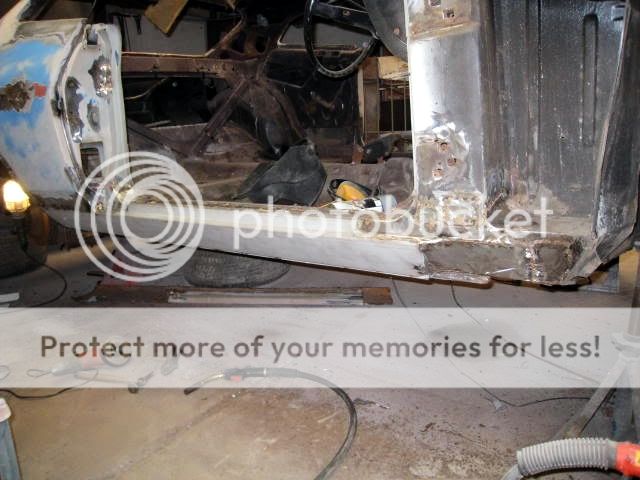 Sill panel is now on 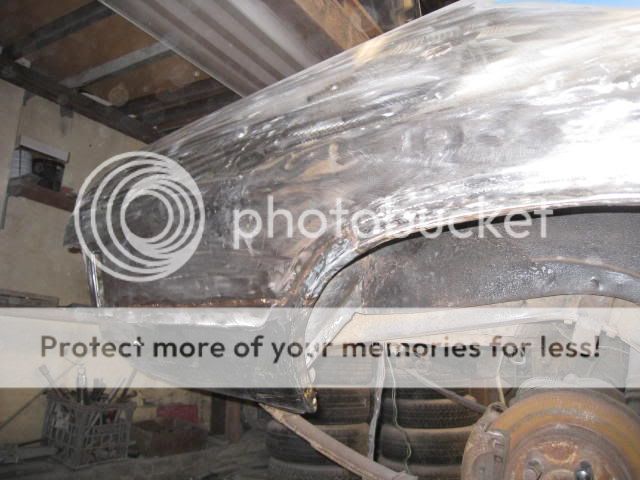 New lower panel. If you look closely you can see the previous wheel arch repairs. I added some new steel on the inside of the lip where it was rusty. Its all good now. 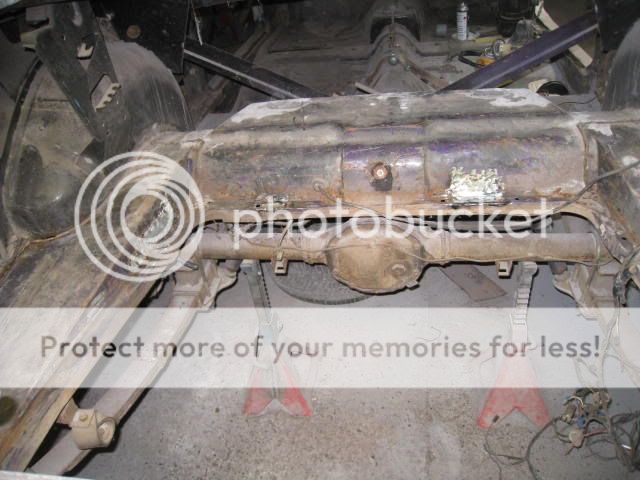 Boot floor had a little rust also. Drivers door was rotten so I got a reasonable XB door shell repaired that and grafted the XA handle insert back into the shell. |
||
|
|
|
|
10-09-2009, 12:21 AM
|
#7 | ||
|
Regular Member
Join Date: Mar 2007
Location: Sydney
Posts: 340
|
The coupe is coming along quite nicely. Weld weld weld.
 Here I have to replace the 2 sides and rear section along with 3 corners. I had to modify one bottom corner to fit it into the top left corner. No one makes the top corners for the coupes, unless it comes complete with the rear window panel. The boot hinges that were supplied with the car are off a sedan and are too short  : : The boot lock support has also been ratted from the car, so if we cant get one from a wreck I will have to make one. 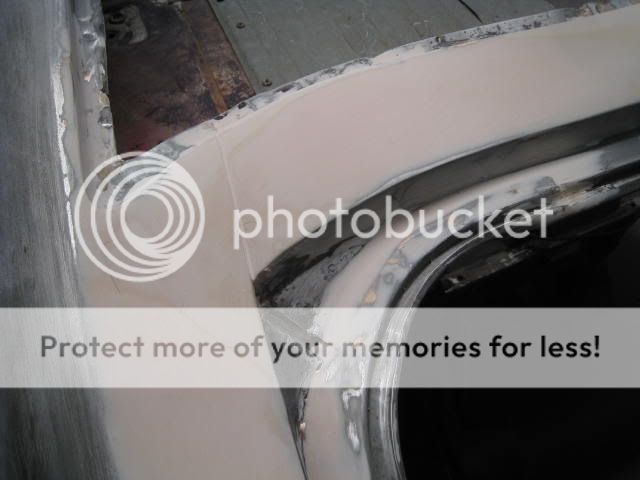 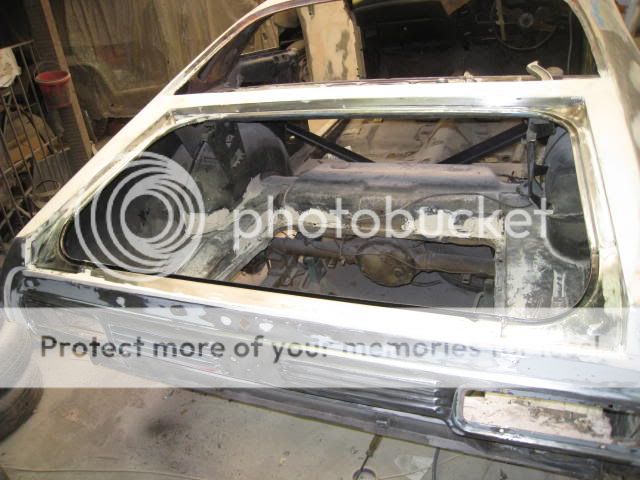 It wont leak now. 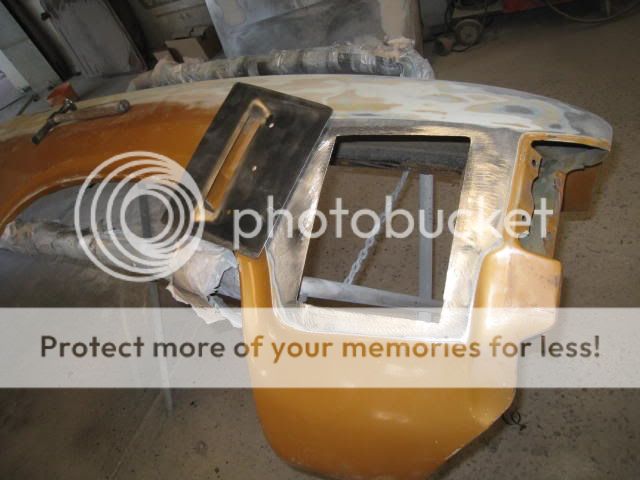 Gotta have the GT flutes in the guards. We wont be putting the ducks feet in the bonnet. 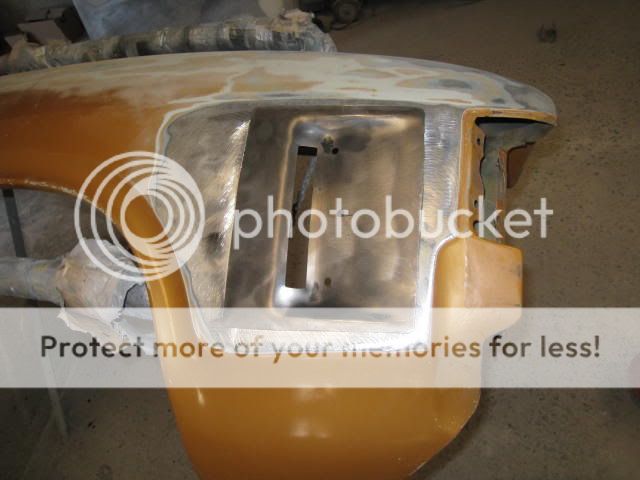 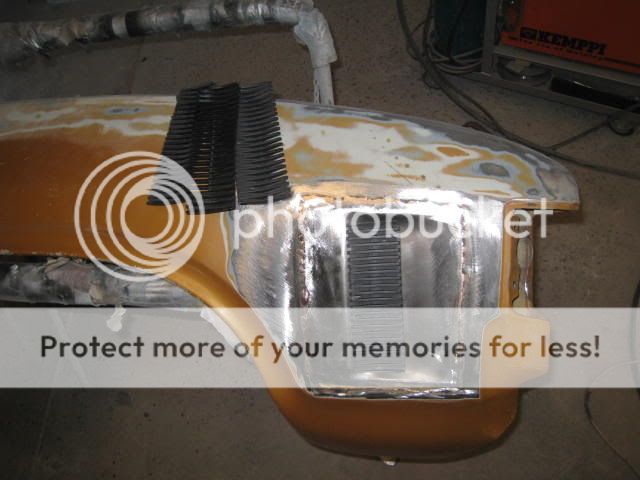 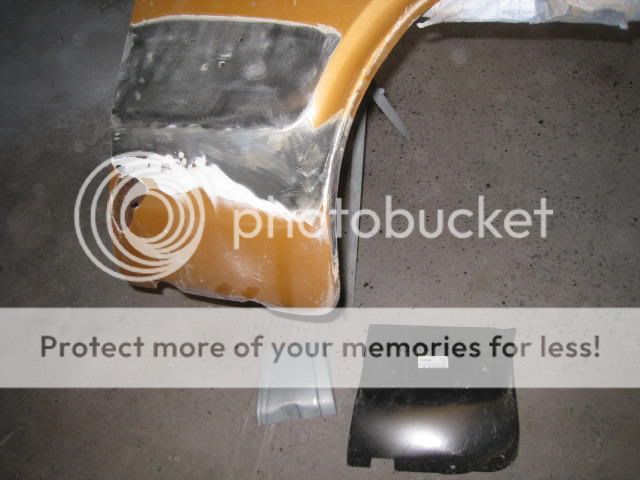 Put a new patch on the bottom. 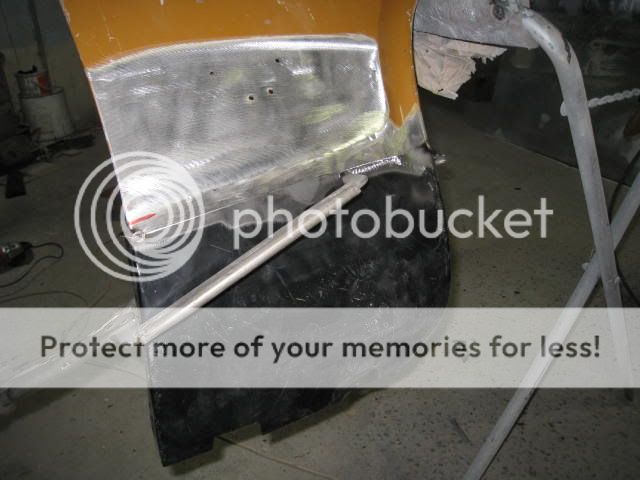 Weld the holes for the badge. 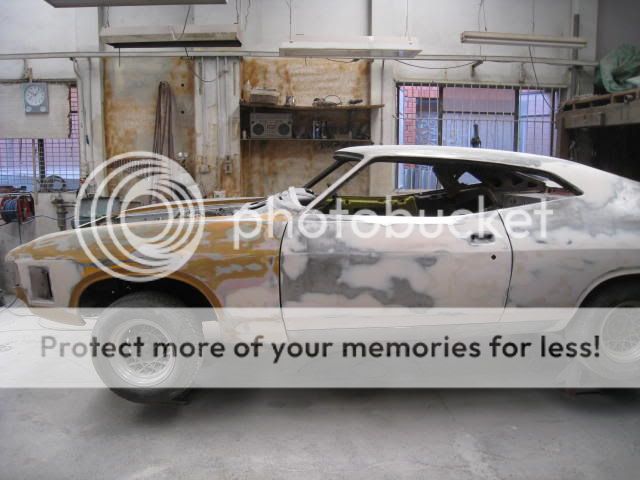 Another new sill panel on this side. Just a skim of body filler over the dents and repairs and its ready for 2k Hifill. 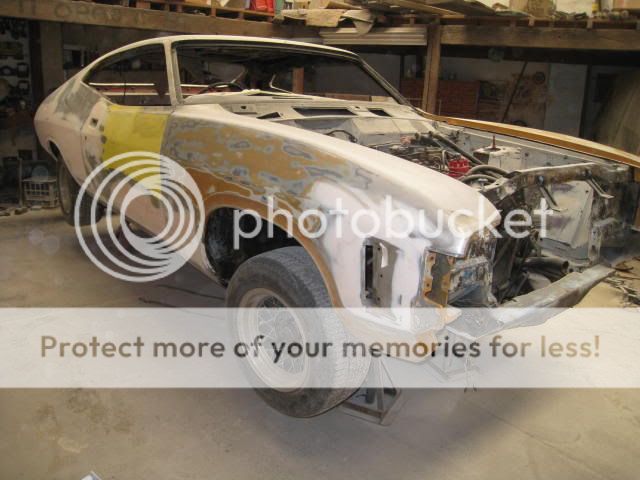 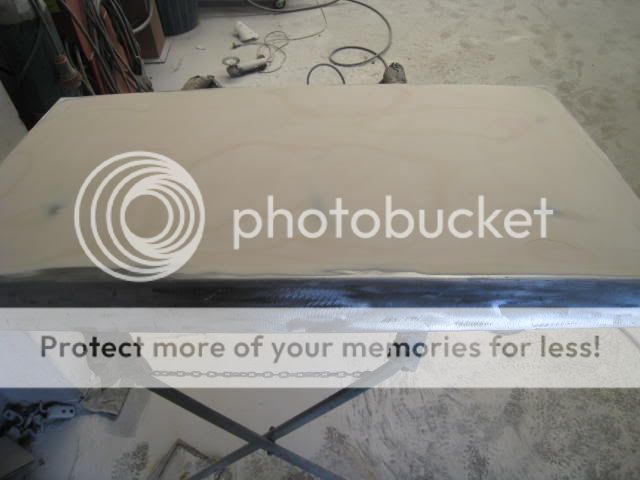 The boot lid is now full of body filler as it had the cancer as well. It buckled when the patch panels were welded in where the rust was. 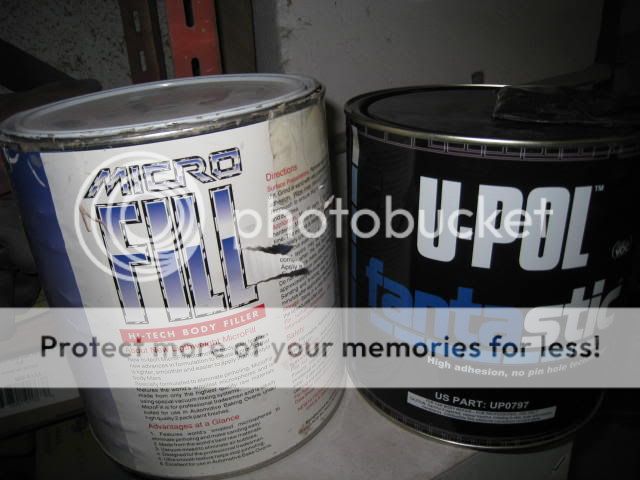 The best body filler I have used is the Micro Fill. Very easy to rub back with 80 grit sandpaper even if you have to rub it the next day.It is Aust made by Hi Chem in Melbourne. The other one U Poll Fantastic this is excellent as well spreads like warm margarine. I try all the body fillers and compare them on the same car on the same day etc..... There are a lot of crap fillers out there that require too much work to get flat quickly. I got 4L of Wild Violet base coat to go on. Should have a little left over. |
||
|
|
|
|
10-09-2009, 08:09 AM
|
#8 | ||
|
FF.Com.Au Hardcore
Join Date: Sep 2007
Location: New Zealand
Posts: 1,649
|
Jeeze - you're really getting through it.
Nice work - need a holiday in NZ? Wish I could copy and paste off the internet on to my coupe LOL
__________________
He who dies with the most toys wins!! "Target acquired .... target engaged ..... TARGET ANGRY!!!" |
||
|
|
|
|
11-09-2009, 01:32 AM
|
#9 | ||
|
Regular Member
Join Date: Mar 2007
Location: Sydney
Posts: 340
|
Ha
yea copy and paste is a good idea maybe if you fax your coupe over to me I could fax it back completed.A few more pics coming up. I made a dual exhaust panel for the rear 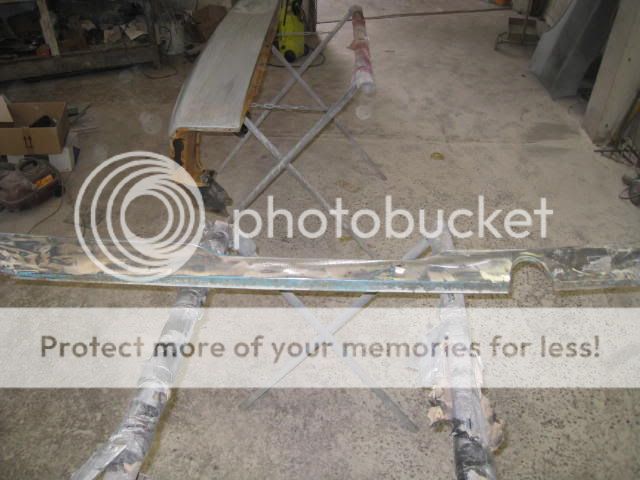 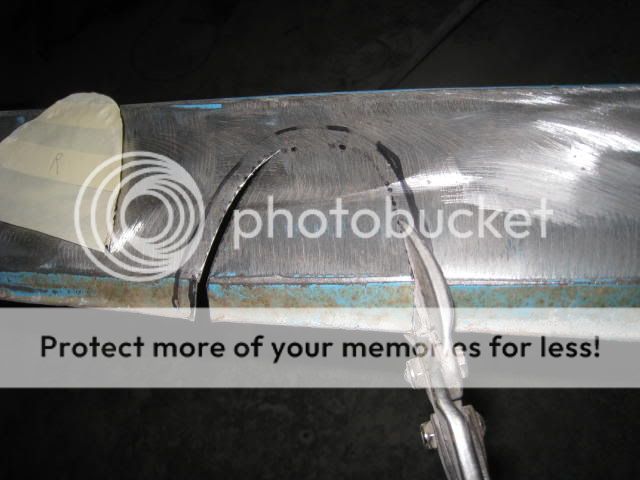 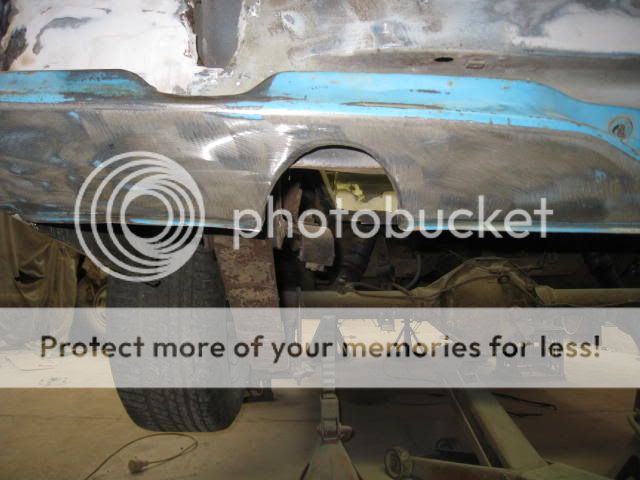 Trial fit to see how it looks. 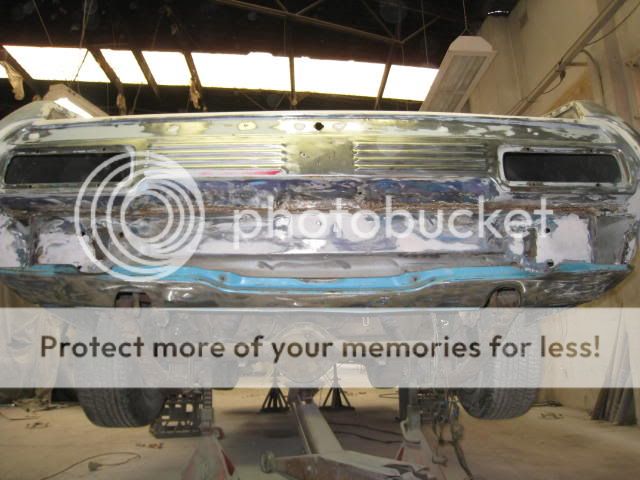 Get the tin snips cut the hole, then take a pair of pliers and little by little fold the return edge into it. A genuine ford dual exhaust panel now 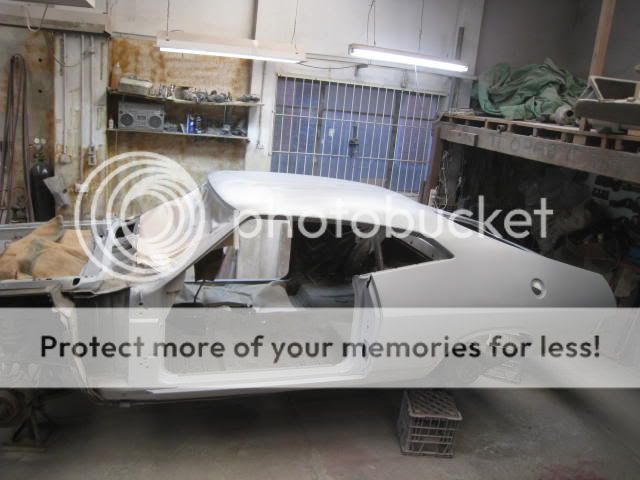 Hifill primer is on, it looks a lot better now 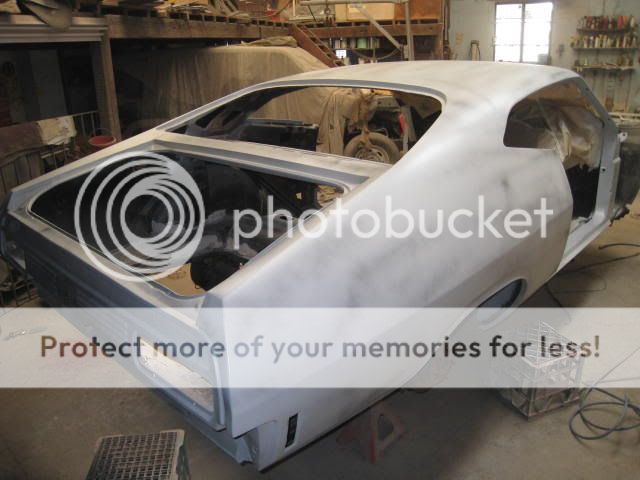 I will rub this back with water starting with 320 or 400 sand paper on a long block, Dry it guide coat it again then block it back wet with 600 to remove the 320 scratches. Add any seam sealer now before the colour goes on. |
||
|
|
|
| This user likes this post: |
|
11-09-2009, 09:54 AM
|
#10 | ||
|
Donating Member
 Join Date: Dec 2004
Location: QLD
Posts: 11,772
 
|
Looking good!! Nice job
|
||
|
|
|
|
11-09-2009, 10:02 AM
|
#11 | ||
|
Virtuous Bogan (TM)
 
Join Date: Jan 2005
Location: TAS
Posts: 27,439
|
There is so much work there and it makes you want to buy a cheapy coupe and fix one up....or not.
Nice progress and thanks for the updates!
__________________
|
||
|
|
|
|
11-09-2009, 12:41 PM
|
#12 | ||
|
Blue blooded
Join Date: Oct 2007
Location: New Zealand
Posts: 707
|
Looking great bud!!
Its not taking you long to get through it  : :
__________________
My XA Coupe build http://www.fordforums.com.au/showthread.php?t=11259539 |
||
|
|
|
|
11-09-2009, 11:01 PM
|
#13 | ||
|
Supreme Machine!

Join Date: Jan 2005
Location: Geelong
Posts: 857
|
your doing a great job with the bodywork, i use the upol filler too, its great, the lines look nice and sharp, nice!
__________________
1972 XA Falcon Sedan, 408c Chi 3v's 622hp 1960 FB Holden Wagon, Yellow, 192, 4spd, My XA Build-Up http://www.fordforums.com.au/showthr...&page=10&pp=25 |
||
|
|
|
|
12-09-2009, 01:46 AM
|
#14 | ||
|
Regular Member
Join Date: Mar 2007
Location: Sydney
Posts: 340
|
Polyal there is a lot of work in respraying any old vehicle it seems never ending. It is cheaper and easier to buy one already done and hope it has metal welded back where the rust is/was. But then again where is the fun in that. :rolleyes:
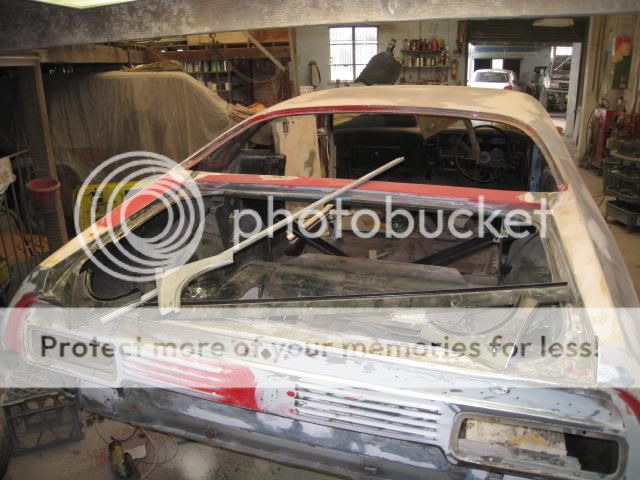
I painted the back edge of the guards and front edge of the doors and hinge pillar before I fitted it up for the spray painting. This way I know it will have paint where it is difficult for the spray gun to reach, 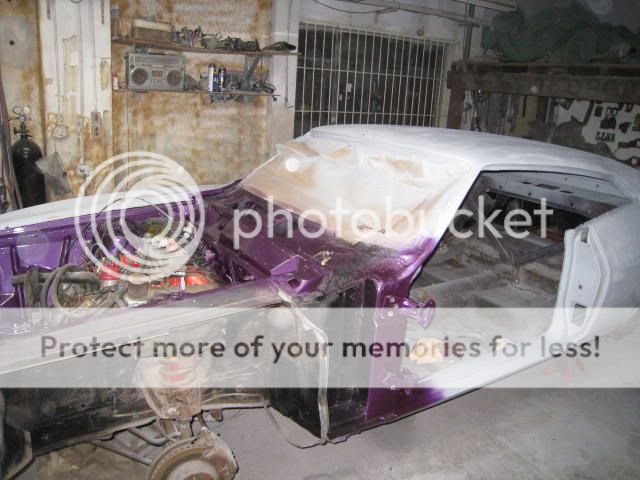 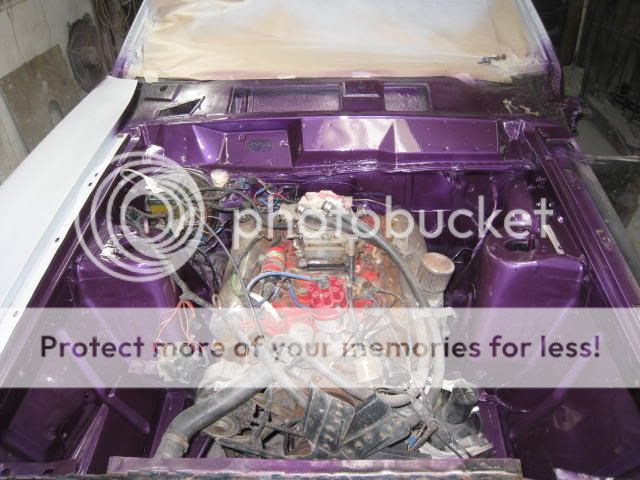 Engine bay looks good again.  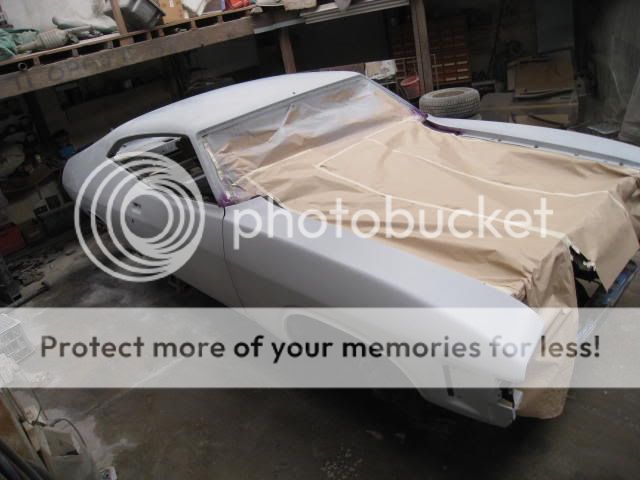 Ready for painting I open the door and do the insides as Im going around. 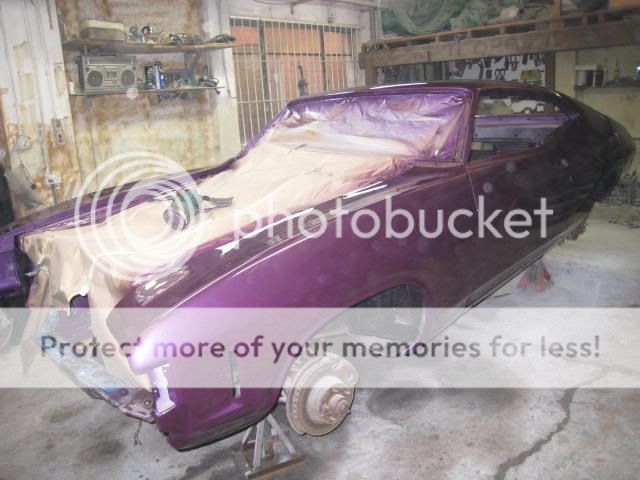 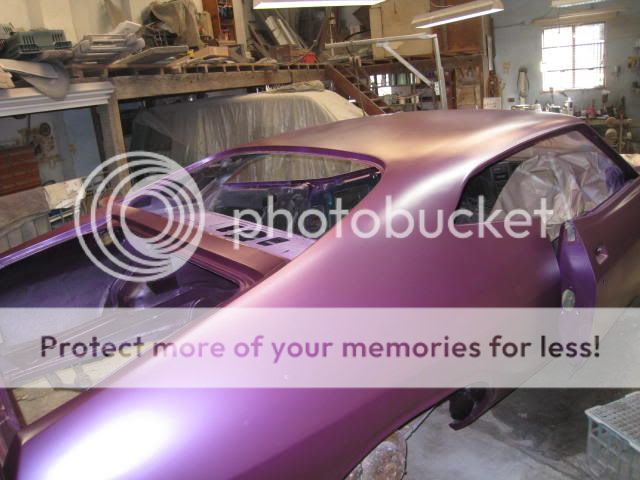 Here it is in base coat I gotta wait 20 mins before finishing with clear coat. The flash makes the colour look different to what you see. :Clear coat is on the last pic is with the flash off. 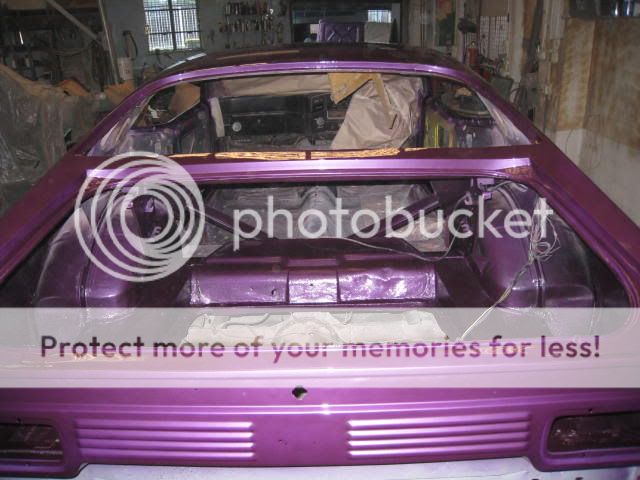  Ill put up some pics of it tomorrow or is that today as it is now after midnight again. Arrggghhhhh the owner now wants the satin black bonnet, sills etc, and rear end to go with the boot lid wing. . |
||
|
|
|
|
12-09-2009, 01:52 PM
|
#15 | ||
|
Regular Member
Join Date: Feb 2009
Posts: 326
|
!!!!!!
Fast work! is that really all done in 1 week? looks great |
||
|
|
|
|
12-09-2009, 06:04 PM
|
#16 | ||
|
Regular Member
Join Date: Mar 2007
Location: Sydney
Posts: 340
|
I thought I would just take a few pics today but found myself painting colour under the bonnet so Monday I will be able to paint the top side black if I get a chance.
White roof lining and black carpet going in on Monday also.  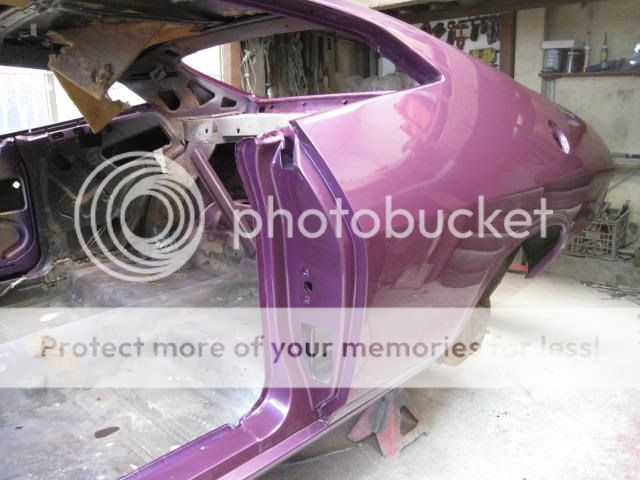 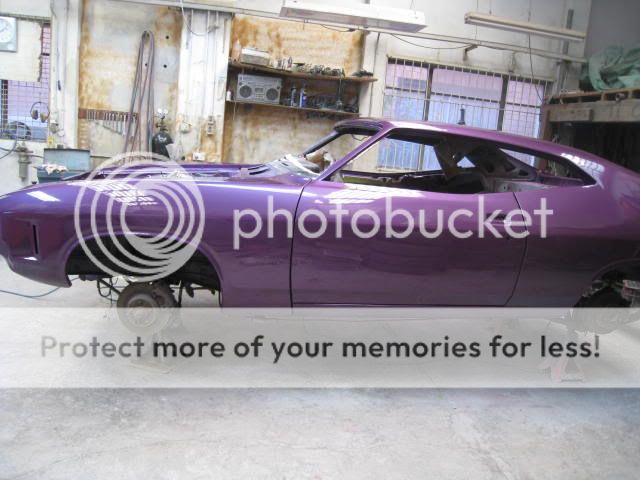 This is the best the coupe will ever look, its down hill from here on--- someone will scratch, chip or dent it soon :evil3: I know get over it, its only a car! |
||
|
|
|
|
13-09-2009, 09:21 AM
|
#17 | ||
|
Blue blooded
Join Date: Oct 2007
Location: New Zealand
Posts: 707
|
WOW that looks fantastic!!! I cant believe you have acheived so much in such a short time!!! Can you please ring my panelbeater/painter and give him a rev up??
__________________
My XA Coupe build http://www.fordforums.com.au/showthread.php?t=11259539 |
||
|
|
|
|
13-09-2009, 02:32 PM
|
#18 | ||
|
74xbkoop

Join Date: Mar 2008
Posts: 204
|
Looking great, I cant beleive how quickly you are getting through it. Well done
|
||
|
|
|
|
13-09-2009, 09:17 PM
|
#19 | ||
|
FF.Com.Au Hardcore
Join Date: Jul 2007
Posts: 669
|
Mate you are flying through that, and the work is looking awesome.
|
||
|
|
|
|
17-09-2009, 12:01 AM
|
#20 | |||
|
Regular Member
Join Date: Feb 2009
Posts: 326
|
Quote:
|
|||
|
|
|
|
17-09-2009, 07:13 PM
|
#21 | |||
|
Regular Member
Join Date: Mar 2007
Location: Sydney
Posts: 340
|
Quote:
Panelbeating workshops will have certain jobs towed from the workshop by the insurance companies if they don't have a copper silicon welder because the weld will be inferior to the original strength done by the factory. The insurance co. will not risk being sued by authorizing repairs that it knows is substandard. One of the problems with normal steel mig welds is that the surrounding metal is heated to a puddle as the weld occurs this weakens the parent metal and fatigue can occur here especially on the steel used on late model cars. Yes I suppose it is like brazing without the dreaded flux to clean off and I would say up to 40% faster including clean up of the welds, less buckling etc. The strength of either welds is not an issue with restorations of old motor vehicles as the steel used 30 plus years ago is thicker than the hi tech steel used in todays motor vehicles. |
|||
|
|
|
|
18-09-2009, 06:58 PM
|
#22 | ||
|
Regular Member
Join Date: Mar 2007
Location: Sydney
Posts: 340
|
The new carpet and white roof lining were installed on Tuesday.
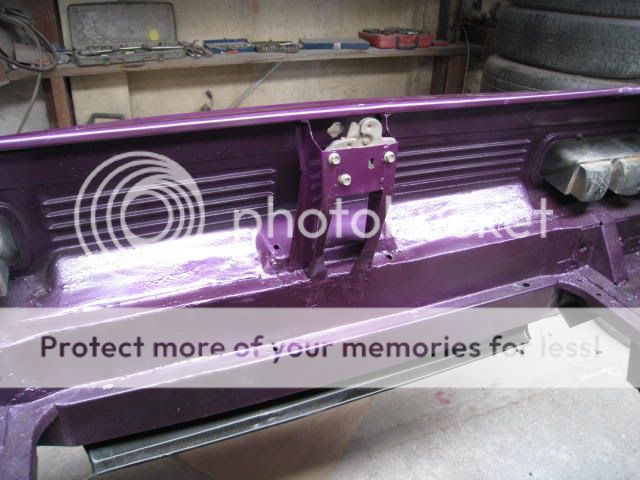
I had to make a boot catch support and install it. 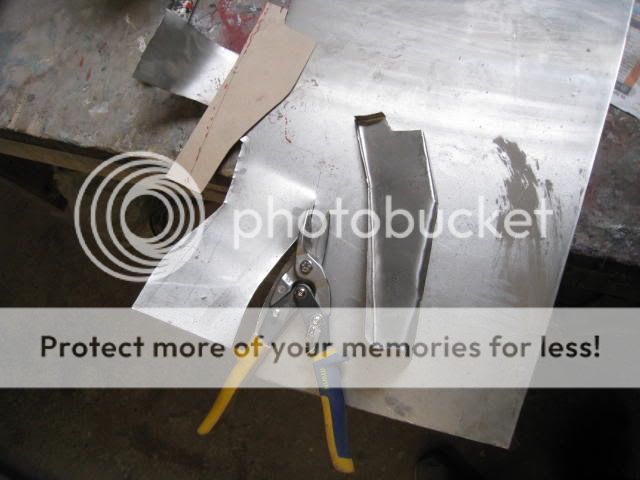 Almost finished I will drill the holes for the bolts on the latch, coat of paint and it is all done. 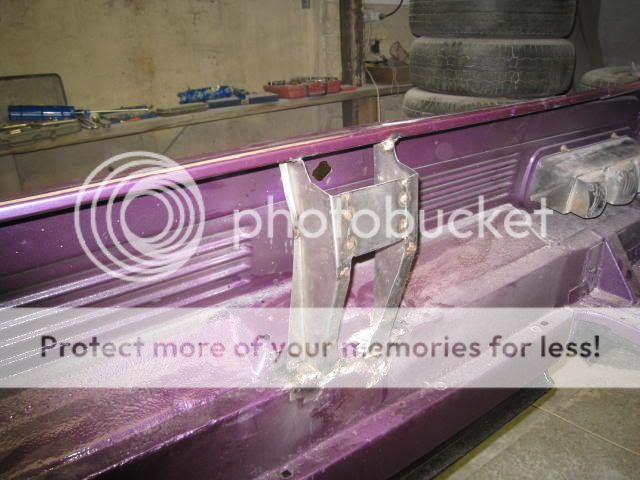 Spraying cavity wax into all the enclosed sections with the fogger. I insert the tube in to where I want the wax to protect and slowly withdraw it with the spray coating everything on the way out. Spraying in side the sill panel. 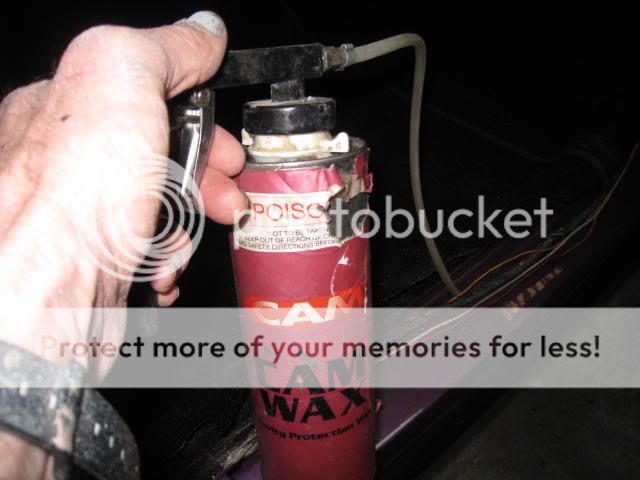 Here you can see the fogger in action spraying in 3 directions at once.  Here a pic of the Wild Violet and black border paint. 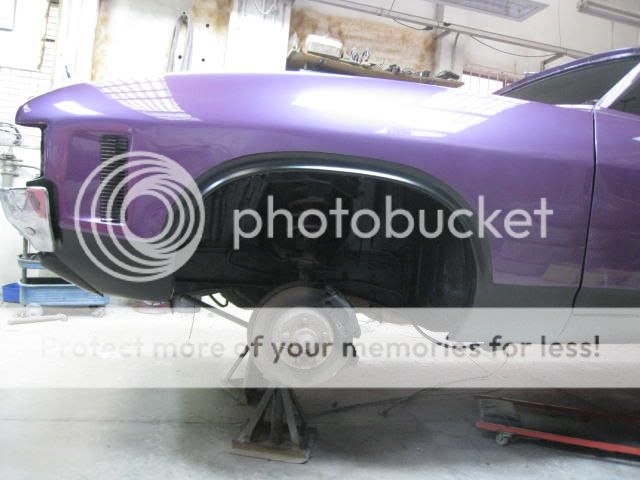 Front w/screen is now in. |
||
|
|
|
|
18-09-2009, 07:06 PM
|
#23 | ||
|
Blue blooded
Join Date: Oct 2007
Location: New Zealand
Posts: 707
|
That colour combo looks great!! I am so blown away at how fast you have built this coupe!!!
__________________
My XA Coupe build http://www.fordforums.com.au/showthread.php?t=11259539 |
||
|
|
|
|
22-09-2009, 01:03 AM
|
#24 | ||
|
Regular Member
Join Date: Mar 2007
Location: Sydney
Posts: 340
|
Hi fordmfp this is not the first coupe I have done and as they say, practice makes perfect.
 Waiting for the tow truck 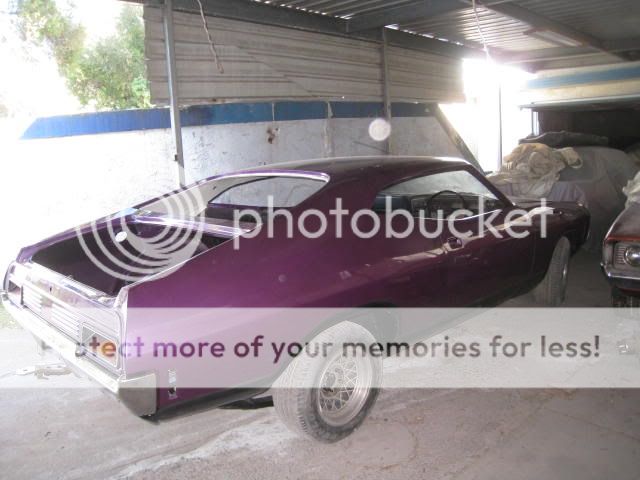 Still dont have the boot hinges yet. Towed out Saturday morning for the owner to fit the coupe up at his home. Ill get some more pics when he gets a bit more done to it. He has new white seats to be installed. Rubber kit dash top changed etc etc........ Another coupe turned up today : 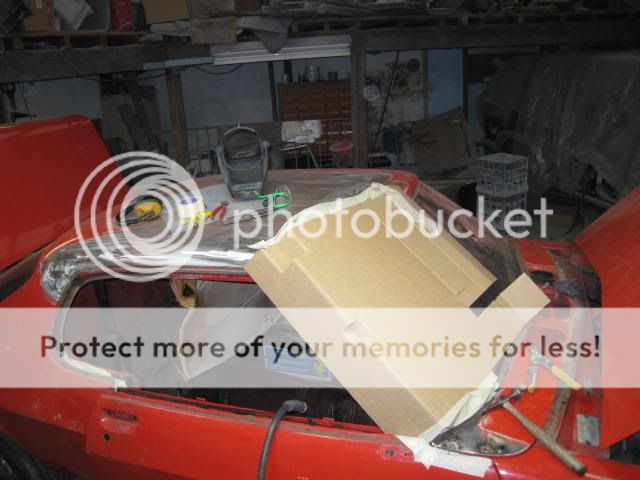
|
||
|
|
|
|
23-09-2009, 02:45 PM
|
#25 | ||
|
FF.Com.Au Hardcore
Join Date: Sep 2007
Location: New Zealand
Posts: 1,649
|
The XA looks fantastic.
I also want one of those Monaros in my shed. Actually I'd like my shed to have my XB coupe, a Monaro and a Valiant Hardtop in it (dreams are free) Hopefully you will do a project thread for the Monaro. Some of us aren't single brand fans, more 70's muscle car fans.
__________________
He who dies with the most toys wins!! "Target acquired .... target engaged ..... TARGET ANGRY!!!" |
||
|
|
|
|
13-10-2009, 12:40 AM
|
#26 | ||
|
Regular Member
Join Date: Mar 2007
Location: Sydney
Posts: 340
|
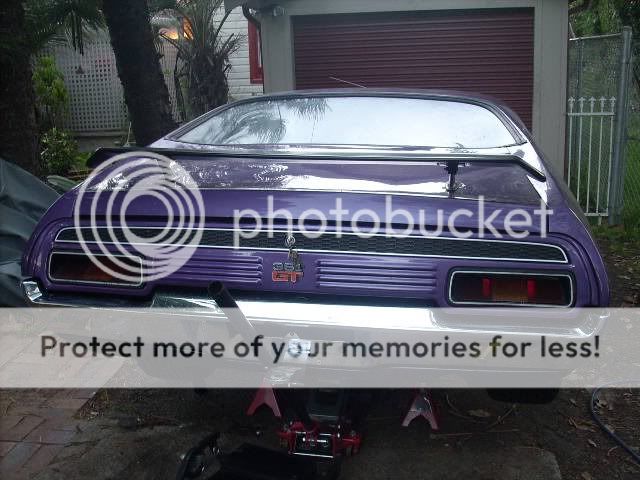
Here you are a couple of pics of the Monaro all painted.
These things get rust just as bad as fords. He will drive it home like this and assemble it at his leisure. 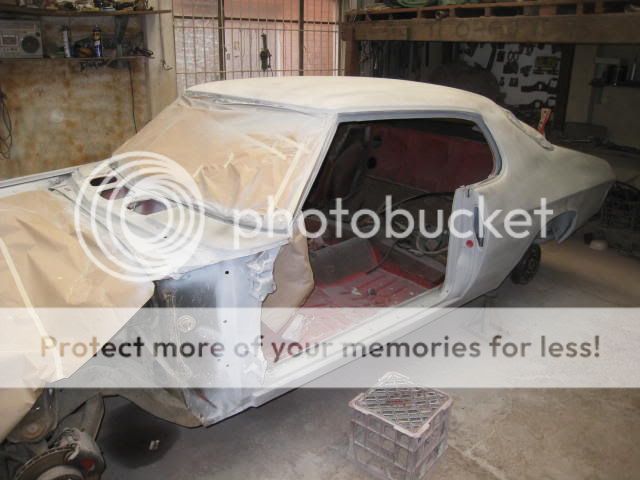 Only one new sill panel required the other is rust free. 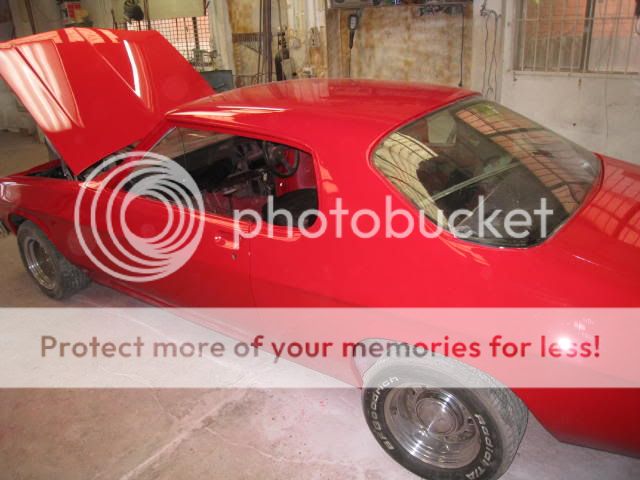 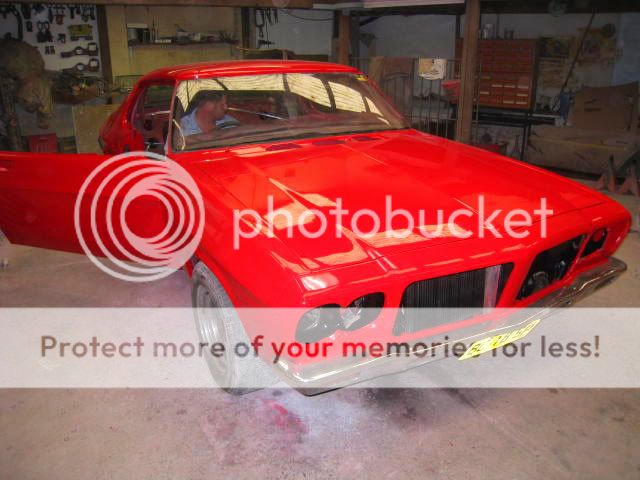
|
||
|
|
|
|
13-10-2009, 12:44 AM
|
#27 | ||
|
Awesome

Join Date: Oct 2007
Location: In my own little world..Everyone here knows me :)
Posts: 9,401
|
Oh that is nice! Don't see many of those around anymore...Love old muscle!
__________________
|
||
|
|
|
|
13-10-2009, 09:14 AM
|
#28 | ||
|
FF.Com.Au Hardcore
Join Date: Mar 2008
Posts: 954
|
Great work you are an artisan!
|
||
|
|
|
|
13-10-2009, 10:27 AM
|
#29 | ||
|
351XB - Underbelly II Car

Join Date: Aug 2006
Location: In a nuthouse !!
Posts: 1,257
|
Monaro reminds me of "One HQ For U " that Street Machine Magazine gave away back in the '80 s !
__________________
FALCON XB 351 - UNDERBELLY II CAR |
||
|
|
|
|
15-11-2009, 05:06 PM
|
#30 | ||
|
Regular Member
Join Date: Mar 2007
Location: Sydney
Posts: 340
|
Rear end looks better with all the trims and tail lights in.
 Top loader gearbox has had a new oil seal and bearing fitted. |
||
|
|
|
| 2 users like this post: |


 Linear Mode
