
|
|

|
|
|
|
Welcome to the Australian Ford Forums forum. You are currently viewing our boards as a guest which gives you limited access to view most discussions and inserts advertising. By joining our free community you will have access to post topics, communicate privately with other members, respond to polls, upload content and access many other special features without post based advertising banners. Registration is simple and absolutely free so please, join our community today! If you have any problems with the registration process or your account login, please contact us. Please Note: All new registrations go through a manual approval queue to keep spammers out. This is checked twice each day so there will be a delay before your registration is activated. |
|
|||||||
 |
|
|
Thread Tools | Display Modes |
 11-04-2009, 10:18 PM
|
#1 | |||
|
AU DIE HARD
  
Join Date: Nov 2005
Location: Between 2nd and 5th gear
Posts: 5,073
 
|
Well the ongoing sarga of #2 sons S3 SR with the oil leak fixed and the ball joint and brakes done It was time to chase down the "Stalling when Hot Syndrome"
 : So we assumed it was a coil /spark/electric problem, easy just replace the lot , First out was the plugs, the car has been running fine, a little heavy on fuel and apart from the stalling when hot no real problems, So needless to say I was surprised to fine this in #1 and #2 hole gees only 164989 ks on the factory iridiums : So we assumed it was a coil /spark/electric problem, easy just replace the lot , First out was the plugs, the car has been running fine, a little heavy on fuel and apart from the stalling when hot no real problems, So needless to say I was surprised to fine this in #1 and #2 hole gees only 164989 ks on the factory iridiums  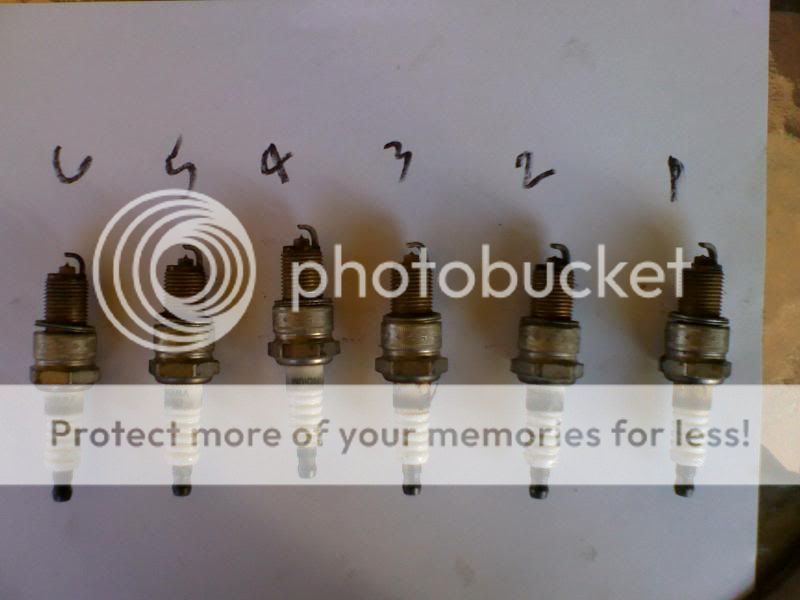 .   So if you plan on replacing the lot this was how I went about it .. things you will need ' 1. set car ramps 2. small socket set 3, sparkplug socket 4.Blade/ phillips head screw driver 5. pair pliers If you are doing the coil pack it is way easyer to get at from under the car than from the top 1. Run the car up on to the ramps ,secure and chock wheels. open bonnet and let cool. Best done when stone cold (the coil pack is along side heater pipe : 2. Remove plug leads 1 at a time, (Now the plug cups may be stuck on to the plugs and require some effort to remove as SMALL amout of grease on the new plug end should avoid this next time you have to remove them) if they are not factory and numbered NUMBER them as you take them off (this is easy done with some masking tape just rite the number on it in texta) 3. Remove spark plugs ( if the plug starts off easy to remove then goes tight again it could have a carbon build up on the end of it just carefully wind the plug back and fowards in the hole still it frees up. alloy heads can strip threads very easy so dont give it the big heave ho) I usually wipe a small bit of grease on the thread of the plug before replacing them as well. when tightening the plug it should be firm with out leaning on the rachet to hard.( if youe not sure run the car for a minute or so after your finished and retighten That the easy bit now for the leads and coil pack you will notice the leads are in 2 lot 3 to the front and 3 to the rear 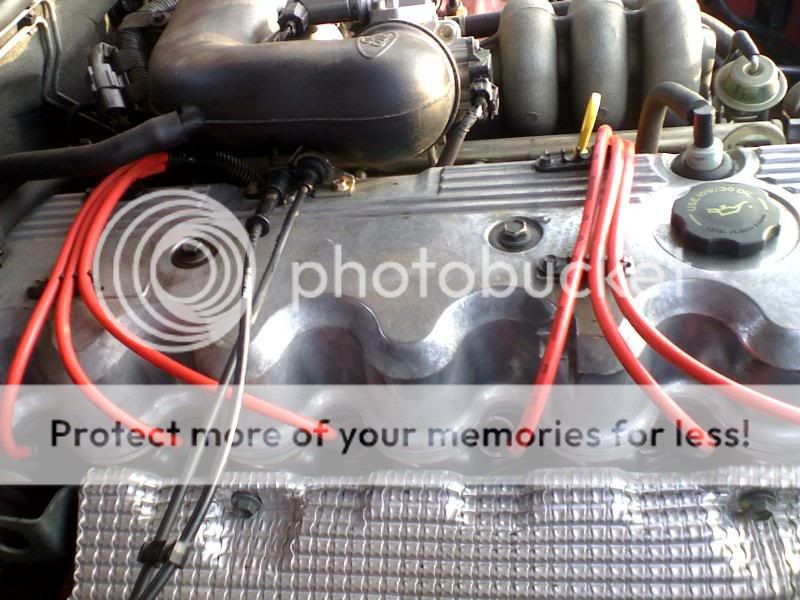 Unclip them from the retainers and allow to sit over the rocker cover loose Now to axcess the coil pack remove the airbox to allow some sort of axcees to the coil and leads .this just requires the removal of 3 10mm bolts, the snorkle and the hose clamp from the aircleaner pipe remove, fom engine bay completey 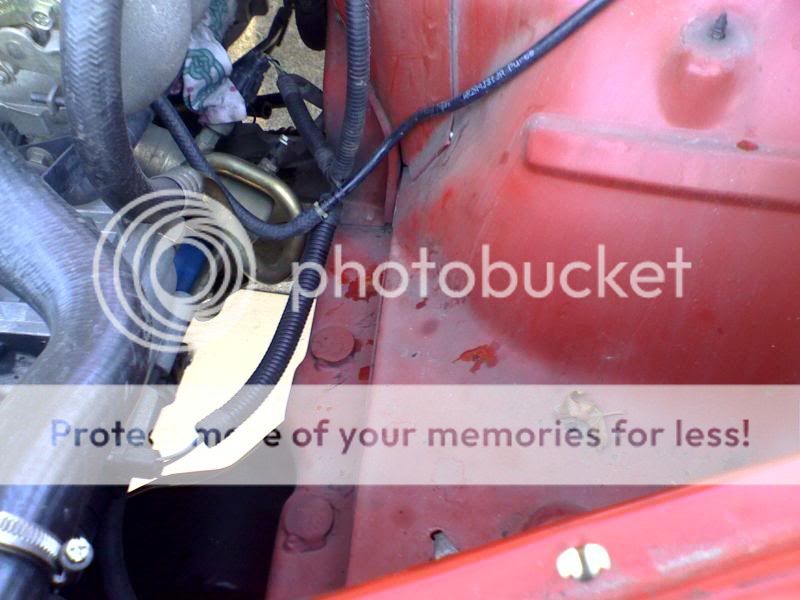 .' 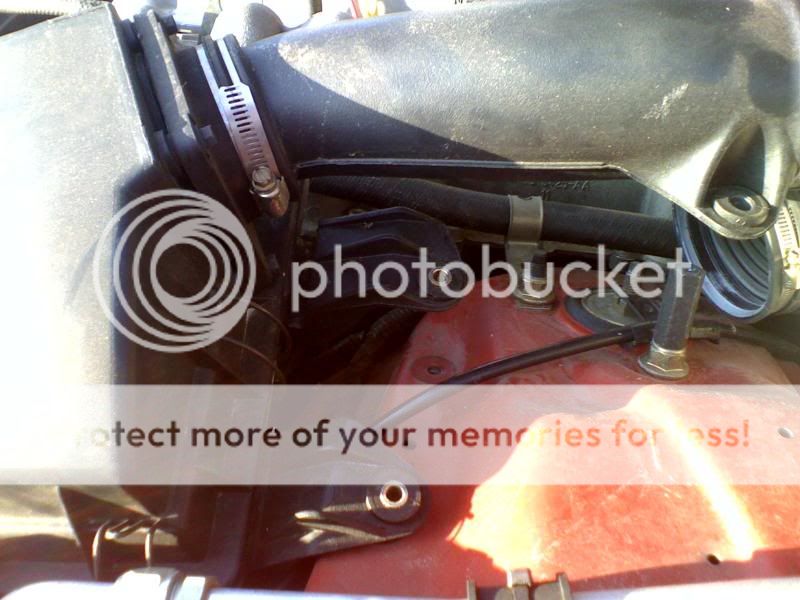 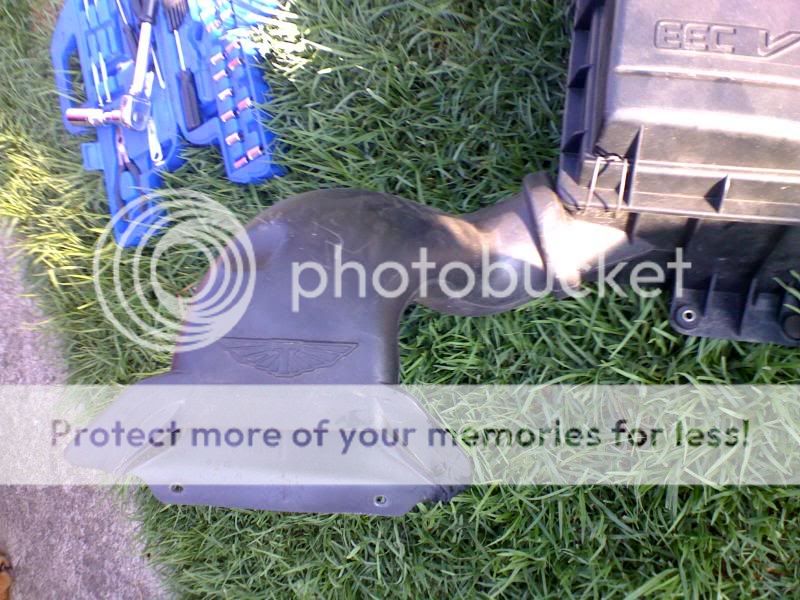 Now if you look under the manifold following the plug leads you will just be able to see the coil pack. this is retained by 2. 7mm bolts at the radiator end and 1 at the rear the top 2 can be undone from the top just remember that pipe is HOT just along side it : a wet rag wrapped around it will allow you to get your arm in there with only minor burns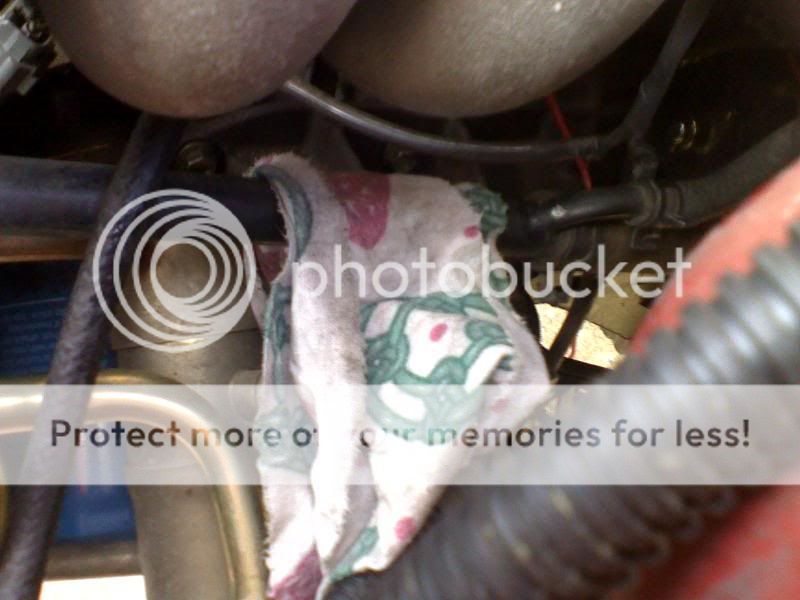 Next get under the car and look up at the coilpack, to remove the last bolt,it may be nessasary to remove one of the coil leads to allow the socket to fit in there, this should have a small condenser thing on the same bolt, Remember to put it back when you refit the pack , on the outside edge of the coil pack you should be able to see the plug in loom this is easy to remove by squeezing the top in and pushing up at the same time.  All going well you should now be able to feed the coil and attached leads out through the bottom of the engine bay. 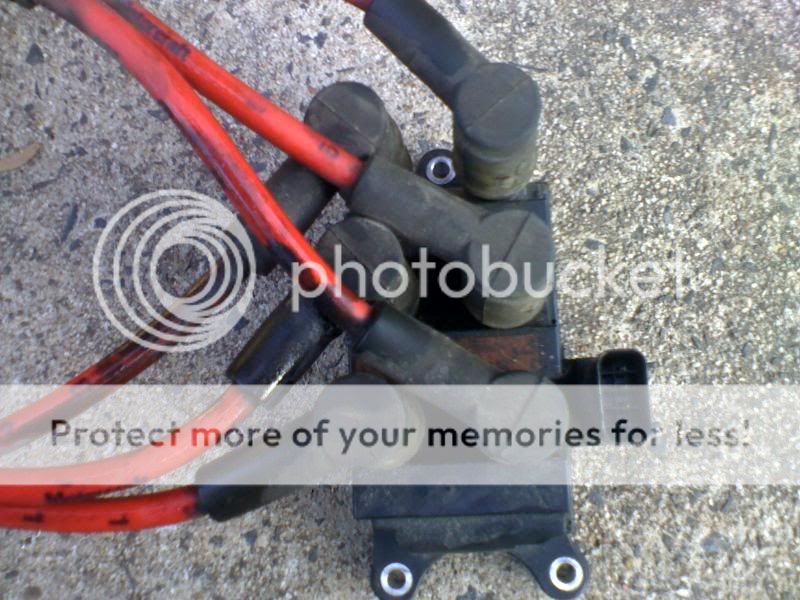 With the coil out on the ground it is just as easy to re fit the leads now rather than feed the back down from the top The order of the pack is as follows With the coil in its position Backrow / engine side front to rear 1...2...3.......... ....................................Frontrow / gaurd side front to rear 6...5...4.......... 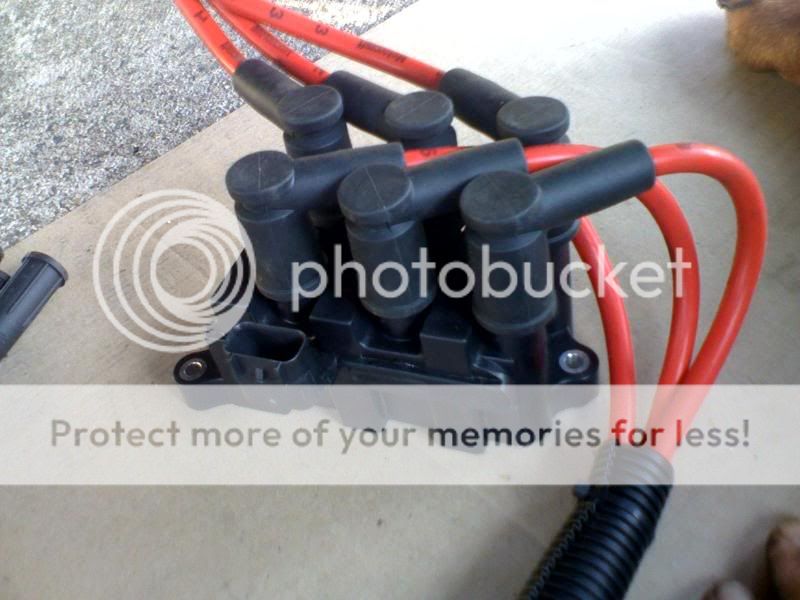 Now this is ware is gets a bit tight to stuff all the leads back from ware they came so what I did was feed 2 bits of wire down from the top to each of the 2 groups 3 of leads First problem was to get the horse from under the car wares she was helping 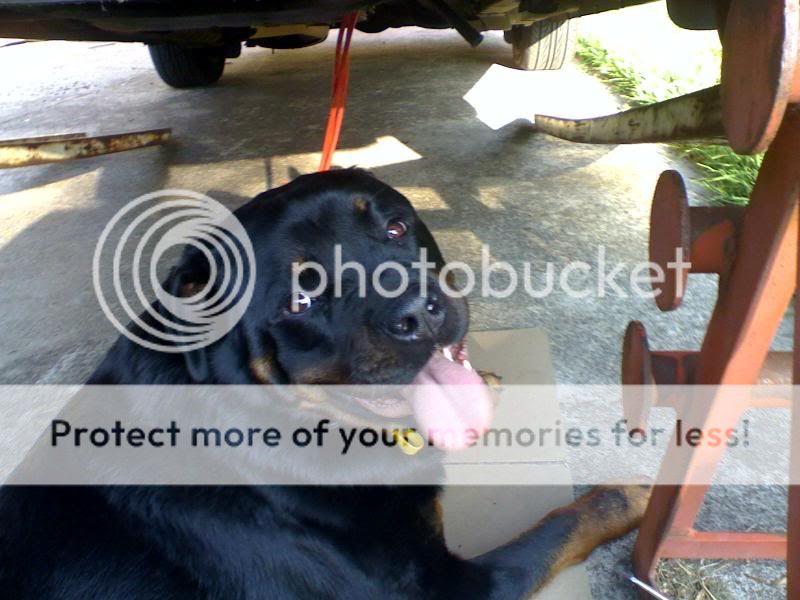 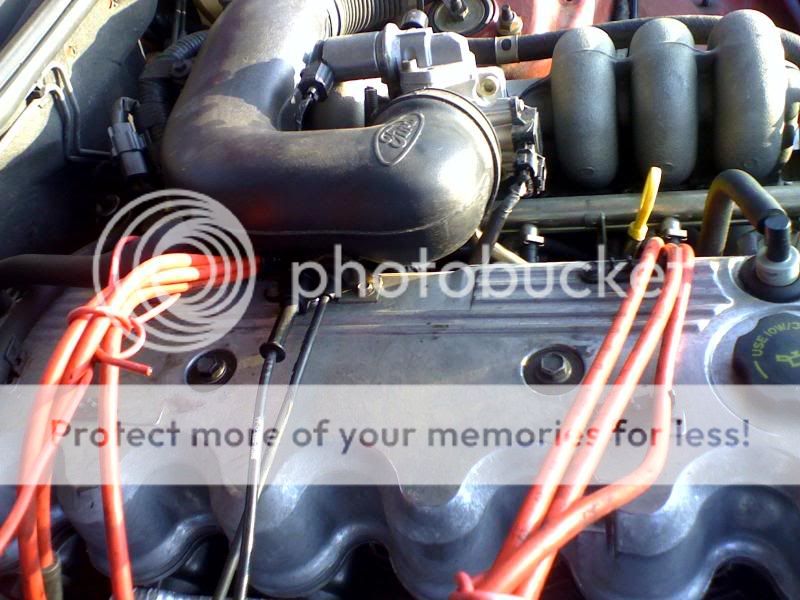 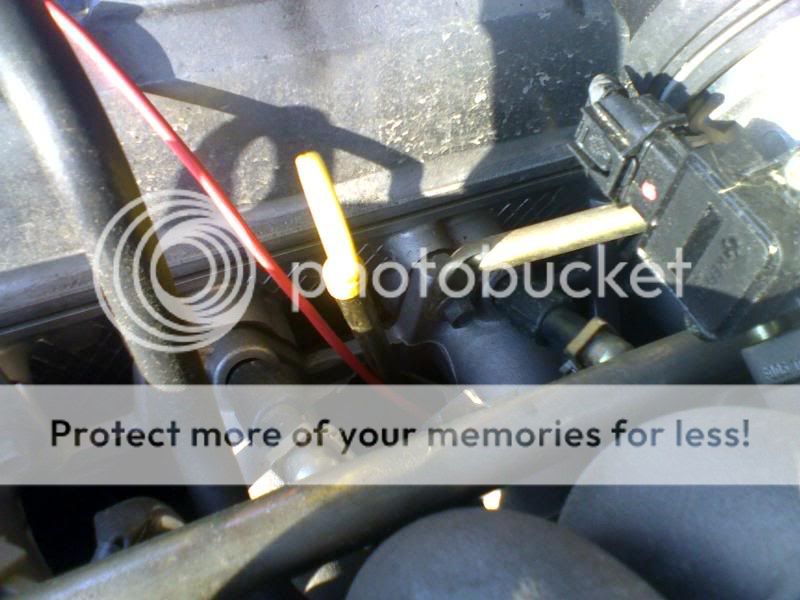 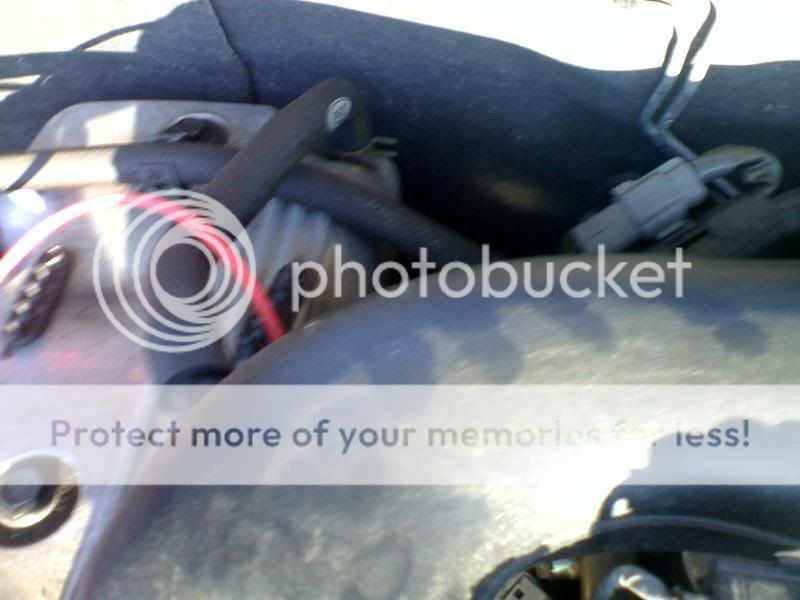 then feed them up as far as I could from the under side then gently pulled them up from the top the rest of the way Now with the leads back up the top just refit the coil pack to it mounts including the condenser thinghy and refit the loom plug 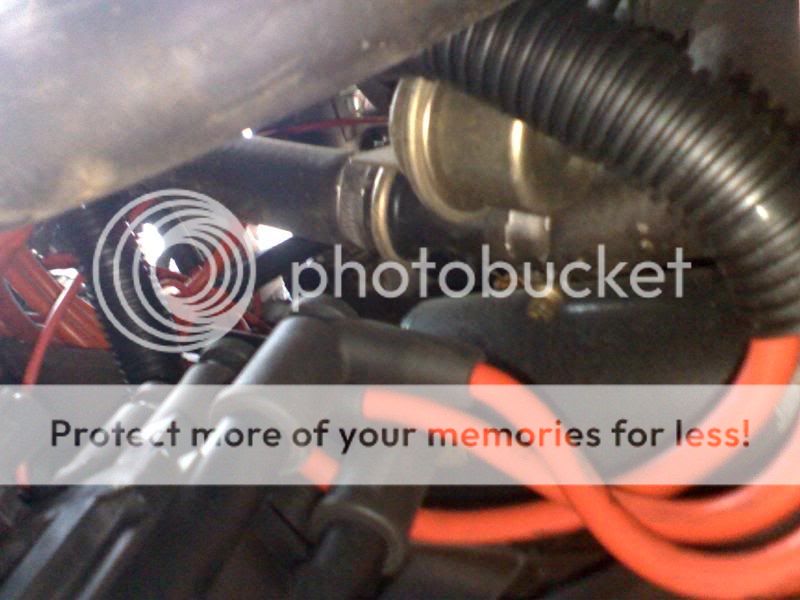 . . 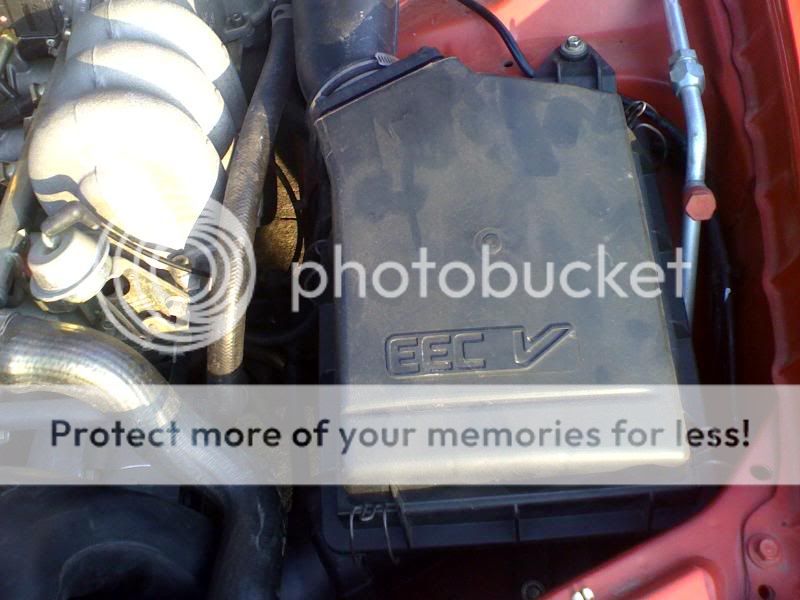 . Back top side again take the feeder wire off and plug the leads back in to there respective plugs easy as (cause you number them rite) cliping them back into there retainers Refit the airbox and hose all done It should take about 1 1/2 to 2 hours depending on how handy you are, Cost was about $200 all up the leads were genuine ford from fleabay. coil pack $100 deliverd Flebat again and $22 trade for the plugs .. The main point is DONT MIX UP THE PLUG LEADS there is nothing hard about the the job just time consuming and a bit fiddely.. Even to just change the leads I would probably take the coil pack out unless you have super small hands and steel capped knuckles ( there"s some sharp bits in there some ware : )How this helps some one along the way Cheers Whoosha
__________________
........Age and treachery will ALWAYS overcome youth and skill....... CORTINA 250 2V POWER soon to be AUXR8 Windsor pwrd .............WINDSOR WARLORD WHO CARRIES THE CLEVO MAFIA AND BROKEN BOSSES... .........................  ......................... .........................Quote:
Last edited by Whoosha; 11-04-2009 at 10:30 PM. |
|||

|

|
|
11-04-2009, 10:29 PM
|
#2 | ||
|
Captain Capilano

Join Date: Mar 2006
Location: South Australia
Posts: 802
|
Good write up! Will help a few people out, Those plugs look stuffed...... lol. I found when doin the leads on my fairmont it is possible to change them without removing the coil pack, its just annoying and i know all too well about the burns from the heater pipe :P
|
||
|
|
|
|
11-04-2009, 11:09 PM
|
#3 | ||
|
ROCKING THE EL FUTURA

Join Date: Nov 2008
Location: HOW DARE YOU
Posts: 2,221
|
good write up mate. as i just bought an au and am looking at changing my plugs and leads this is handy..
|
||
|
|
|
|
12-04-2009, 12:32 AM
|
#4 | ||
|
Miami Pilot
Join Date: Jan 2005
Location: ACT
Posts: 21,699
|
Great write up Whoosha. Love your ramps!
__________________
-----------------------------------------------------------------
The Hammer: FG GTE | 376rwkw | 1/4 mile 11.793 @ 119.75mph 1.733 60' (4408lb) 1 of 60 FG MK1 335 GTEs (1 of 118 FG Mk 1 & 2 335 GTEs). Mods: Tune, ShockWorks and GT335 replicas in 19 x 8.5 & 9.5 35p offset with 245 & 275/35/19 Michelin Pilot sport 5s Daily: BF2 Fairmont Ghia I6 ZF, FG 19 Lux packs with 245/35/19 Toyo and Pirelli tyres, Bilsteins & Kings FPV 335 build stats: <click here> Ford Performance Club ACT |
||
|
|
|
|
12-04-2009, 01:19 AM
|
#5 | ||
|
Regular Member

Join Date: Sep 2007
Location: Perth,South
Posts: 51
|
Great write up.How is the SR running now?
|
||
|
|
|
|
12-04-2009, 03:20 AM
|
#6 | ||
|
Critical Thinker

Join Date: Jan 2005
Location: Adelaide
Posts: 20,272
|
very handy tutorial
__________________
"the greatest trick the devil pulled, is convincing the world he doesn't exist" 2022 Mazda CX5 GTSP Turbo 2018 Hyundai Santa Fe Highlander 1967 XR FALCON 500 Cars previously owned: 2021 Subaru Outback Sport 2018 Subaru XV-S 2012 Subaru Forester X 2007 Subaru Liberty GT 2001 AU2 75th Anniversary Futura 2001 Subaru GX wagon 1991 EB XR8 1977 XC Fairmont 1990 EA S Pak 1984 XE S Pak 1982 ZJ Fairlane 1983 XE Fairmont 1989 EA Falcon 1984 Datsun Bluebird Wagon 1975 Honda Civic |
||
|
|
|
|
12-04-2009, 07:53 AM
|
#7 | |||
|
AU DIE HARD
Join Date: Nov 2005
Location: Between 2nd and 5th gear
Posts: 5,073
|
Quote:
) never to be heard from again. Know doubt I will hear if it stops again :togo:
|
|||
|
|
|
|
15-04-2009, 10:29 AM
|
#8 | ||
|
Regular Member
Join Date: Jul 2007
Location: Western Sydney
Posts: 97
|
Great write up Whoosha. this would have been handy about 2 months ago.
|
||
|
|
|
|
15-04-2009, 11:12 AM
|
#9 | ||
|
All Bran = Regular Member
Join Date: Feb 2006
Location: BrizVegas
Posts: 1,970
|
Nice write up, mate.
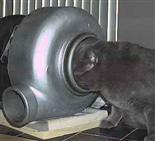
I had the same surprise when I changed my plugs at 150,000 kms. My car had every scheduled service up to 120,000 and I must admit that I assumed the plugs would have been changed somewhere in there. Apparently not. As luck would have it I rang Qld Ignition Leads last week as I plan to change my leads and coil in the next little while. Your write up will help with that exercise but if poss would you send the dog up? I'll stick to your howto but we don't have a mutt these days... |
||
|
|
|
|
15-04-2009, 01:53 PM
|
#10 | |||||
|
AU DIE HARD
Join Date: Nov 2005
Location: Between 2nd and 5th gear
Posts: 5,073
|
Quote:
 : make its fun anyway : make its fun anyway Quote:
They were left overs from a car carryer I used to have  : :
__________________
........Age and treachery will ALWAYS overcome youth and skill....... CORTINA 250 2V POWER soon to be AUXR8 Windsor pwrd .............WINDSOR WARLORD WHO CARRIES THE CLEVO MAFIA AND BROKEN BOSSES... ......................... .........................Quote:
|
|||||
|
|
|
|
15-04-2009, 03:55 PM
|
#11 | |||
|
Flairs - Truckers Delight

Join Date: Aug 2006
Location: Brisbane Northside Likes: Opposite Lock
Posts: 5,731
|
Quote:
__________________
Current: Silhouette Black 2007 SY Ford Territory TX RWD 7-seater "Black Banger"
2006-2016: Regency Red 2000 AUII Ford Falcon Forte Automatic Sedan Tickford LPG "Millennium Falcon" |
|||
|
|
|
|
21-04-2009, 05:56 PM
|
#12 | ||
|
Starter Motor
Join Date: Jan 2009
Posts: 19
|
hypothetically if i was to mix lead 1 and lead 3 up what could potentially happen? if the car was run for under 1/2 hour
|
||
|
|
|
|
21-04-2009, 06:43 PM
|
#13 | ||||
|
AU DIE HARD
Join Date: Nov 2005
Location: Between 2nd and 5th gear
Posts: 5,073
|
Quote:
__________________
........Age and treachery will ALWAYS overcome youth and skill....... CORTINA 250 2V POWER soon to be AUXR8 Windsor pwrd .............WINDSOR WARLORD WHO CARRIES THE CLEVO MAFIA AND BROKEN BOSSES... ......................... .........................Quote:
|
||||
|
|
|
|
21-04-2009, 07:29 PM
|
#14 | ||
|
Starter Motor
Join Date: Jan 2009
Posts: 19
|
lol cheers mate.
fixed my hypothetical problem. |
||
|
|
|
|
22-04-2009, 12:11 AM
|
#15 | |||
|
AFF Whore
Join Date: Apr 2009
Location: In between gas stations
Posts: 2,246
|
Quote:
|
|||
|
|
|
|
12-06-2009, 09:11 AM
|
#16 | ||
|
Treasure your balls?

Join Date: Jul 2005
Location: NW Melbourne
Posts: 2,570
|
Thanks Whoosha. Changed all that crap yesterday on my daily. AU1 slightly different in that the coil carries on from the E series ie. 4 bolts and they're all 8mm.
__________________
Meteorite T3 TS50 ESS |
||
|
|
|
|
12-06-2009, 03:25 PM
|
#17 | ||
|
AFF Whore
Join Date: Apr 2009
Location: In between gas stations
Posts: 2,246
|
God you have to have small hands to get to the coil pack though.... thats the only reason the cab company kept Mr Hardware on =P
|
||
|
|
|
|
22-08-2009, 05:34 PM
|
#18 | ||
|
Starter Motor
Join Date: Oct 2008
Posts: 1
|
Hi guys,
I changed the coil pack on my AUII this morning by following this post by Whoosha. I found it very helpful - thanks Whoosha! The AUII had an intermittent miss which was almost un-noticeable on some days yet on other days the car would run extremely roughly. I had changed the ignition leads and spark plugs previously (and cleaned the throttle body and ICS), but changing the coil pack today has (fingers crossed!) cured the problem - so far there's no sign of a miss and it feels like a new(ish) car again. Thanks again Whoosha! |
||
|
|
|
|
24-08-2009, 02:17 AM
|
#19 | ||
|
GT-P #0336
Join Date: Jan 2005
Location: Melbourne
Posts: 2,360
|
Here's an easier way to do it:
Drop Fairmont off at Whoosha's Pick up couple hours later 
__________________
 2003 FULLY OPTIONED MERCURY SILVER BA GT-P BUILD #336 2003 FULLY OPTIONED MERCURY SILVER BA GT-P BUILD #336  REVERSE CAMERA - SAT NAV - PIONEER SUB & AMP - SUNROOF - DVD PLAYER - CUSTOM DUAL EXHAUST REVERSE CAMERA - SAT NAV - PIONEER SUB & AMP - SUNROOF - DVD PLAYER - CUSTOM DUAL EXHAUST ~Tuned By Bluepower Racing~ |
||
|
|
|
| 2 users like this post: |
|
25-08-2009, 04:03 PM
|
#20 | ||
|
The Monty

Join Date: Oct 2007
Location: Geelong
Posts: 1,226
|
dont forget to eat and drink before u leave tho :P
|
||
|
|
|
|
25-08-2009, 05:31 PM
|
#21 | ||||
|
AU DIE HARD
Join Date: Nov 2005
Location: Between 2nd and 5th gear
Posts: 5,073
|
Quote:
Quote:
Whoosha has moved, with no forwarding address,  : :
|
||||
|
|
|
|
25-08-2009, 05:50 PM
|
#22 | |||
|
GT-P #0336
Join Date: Jan 2005
Location: Melbourne
Posts: 2,360
|
Quote:
: Jokes aside, good write up Whoosh.
__________________
2003 FULLY OPTIONED MERCURY SILVER BA GT-P BUILD #336 REVERSE CAMERA - SAT NAV - PIONEER SUB & AMP - SUNROOF - DVD PLAYER - CUSTOM DUAL EXHAUST ~Tuned By Bluepower Racing~ |
|||
|
|
|
|
25-08-2009, 05:52 PM
|
#23 | |||
|
Former BTIKD

Join Date: Mar 2005
Location: Sunny Downtown Wagga Wagga. NSW.
Posts: 53,197
|
Quote:

__________________
Dying at your job is natures way of saying that you're in the wrong line of work.
|
|||
|
|
|
|
25-10-2009, 12:58 AM
|
#24 | ||
|
quarter pane

Join Date: Mar 2008
Location: Walkerville SA
Posts: 43
|
Another method for those without ramps or a hoist. If you remove the entire air intake system back to the throttle body (only another 2 bolts) you can drop a 30cm 10mm extension (or T-bar) straight down onto the single 7mm bolt on the back of the pack. Standing in front of the car, reach under the manifold with your right hand and push the leads off then twist the pack 90 degrees and pull it out between the bottom of the manifold and the heater hose. If you mark the top of the new leads with the plug number either on a white sticker or with one of those silver paint "texta" style pens then you can put the new pack in the same way, get a nice bright light shining in the right place and peer down between the edge of the rocker cover and the manifold and push the leads home in the proper order. Bit fiddly the first time you do it, but quick after that as you know where your hands need to go. Takes about 20-30 minutes all up. Wear a long shirt though as otherwise you'll rip the skin on your arms to shreds...
(You can also just push the old pack out onto the ground and drop some heavy string down the gap you used to undo the rear bolt, tie it around the new pack and pull it up, then cut the string once you've got the pack into the general position. Have done it both ways but my AUII may have a bit more slack in the heater hose and it will come out via the top.) Last edited by scrivens; 25-10-2009 at 01:08 AM. |
||
|
|
|
|
24-12-2009, 12:17 AM
|
#25 | ||
|
Starter Motor
Join Date: Dec 2009
Posts: 4
|
This is a gr8 article but I think that I need more - Changed leads, plugs and coil pack and still have no spark in number 5. Is there anything else that I should look at before paying body parts to someone with the ford computer?
|
||
|
|
|
|
24-12-2009, 02:55 AM
|
#26 | ||
|
Lost Boost Gained Class
Join Date: Jun 2008
Location: Werribee, Melbourne
Posts: 2,763
|
check to see if the Leads are on right sometimes thay look like there on but there not thats my bet
__________________
2006 BF Fairmont Ghia
2001 AU Falcon |
||
|
|
|
|
11-04-2010, 04:02 PM
|
#27 | ||
|
Starter Motor

Join Date: Dec 2008
Location: Perth
Posts: 6
|
Mate, thanks. I was about to pull off the intake manifold just to change my leads. I am glad I found this before I got too far into it. Saved me alot of time and trouble.
I managed to change them without pulling out the coil, just removing the air box and then getting my hands in there. All in all it took me about an hour to change the leads, but the first 25 mins of that was working out how the ..... to go about it. The ute has done 107 000km, so it will be a while before I have to do it again. Ford wanted to charge (now I suggest you sit down before reading the rest of this) $220 to supply and change the leads. They also want $300 to supply and change 6 spark plugs!!! AUiii Ute. (the other car) Paul Last edited by Navycso; 11-04-2010 at 04:08 PM. |
||
|
|
|
|
26-03-2011, 03:56 PM
|
#28 | ||
|
Starter Motor
Join Date: Mar 2011
Posts: 26
|
So thought i would give this a go changing leads and plugs on my 98' au wagon, hopefully i chose the right leads installing top gun max leads and NGK plugs.
diffinatley needed doing as i started to remove leads from the plugs and they crumbled,  . .Long nose pliers came in real handy.  Managed to get to the coil easy from the top after removing air intake, changed 1 by 1 with a few minor burns top gun lead numbering system helped. Thanks for the picture run through looks harder than it is. Took all of 25mins to do!!! Need to get sum info on cams and what i can do to a straight 6 by myself so if there is any info that would help it would be much appreciated. cheers. |
||
|
|
|
| This user likes this post: |
|
26-03-2011, 05:15 PM
|
#29 | ||
|
Donating Member
Join Date: Aug 2006
Posts: 5,026
|
Is this the same procedure as an EF? As I may be finding myself changing a coil pack shortly.
|
||
|
|
|
|
26-03-2011, 05:37 PM
|
#30 | ||||
|
AU DIE HARD
Join Date: Nov 2005
Location: Between 2nd and 5th gear
Posts: 5,073
|
Quote:
Quote:
|
||||
|
|
|
|
| Thread Tools | |
| Display Modes | |
|
|


 Linear Mode
