With more people realising how bad the au1 brakes are and that a complete conversion kit costs $300ish, which is about what a set of decent pads and rotors cost, that it is a much better option to upgrade to the AU2/AU3 brakes.
This thread will cover upgrading the front brakes/suspension from AU1 to AU2/AU3 gear
Differences
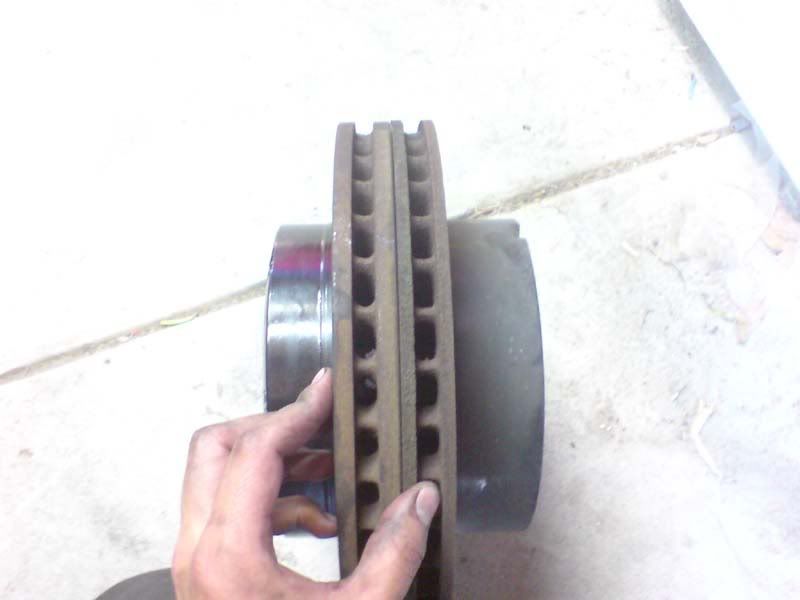
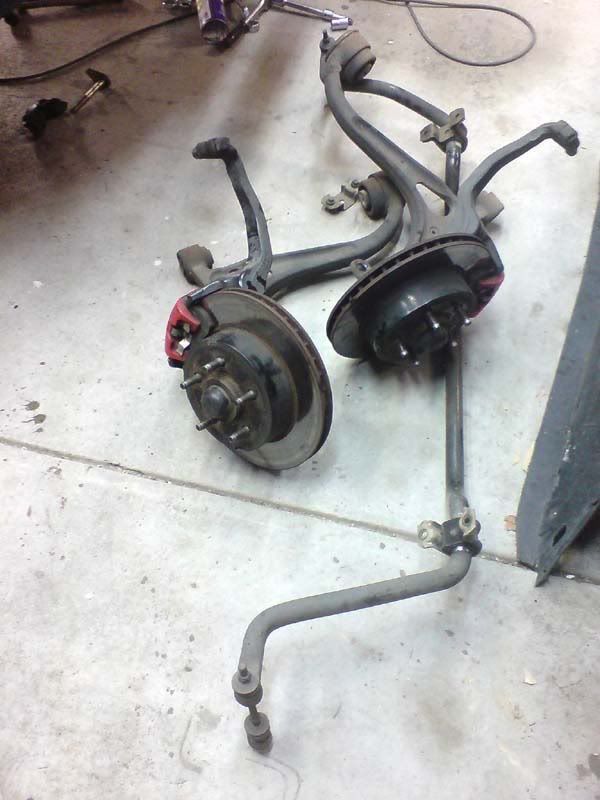
Disc wise there is not much difference. They are the same diameter, and the series 1 disc is 24mm thick, Vs the series 2/3 28mm thick disc. See below for pics.
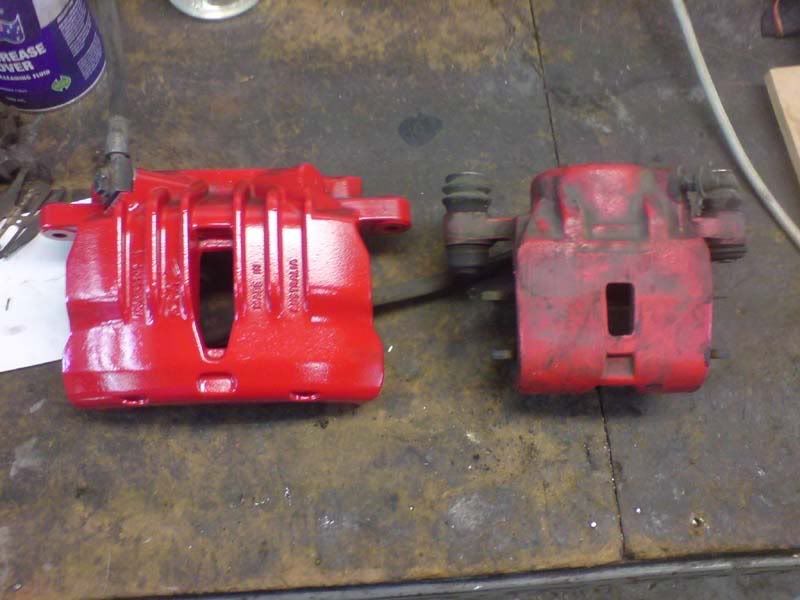
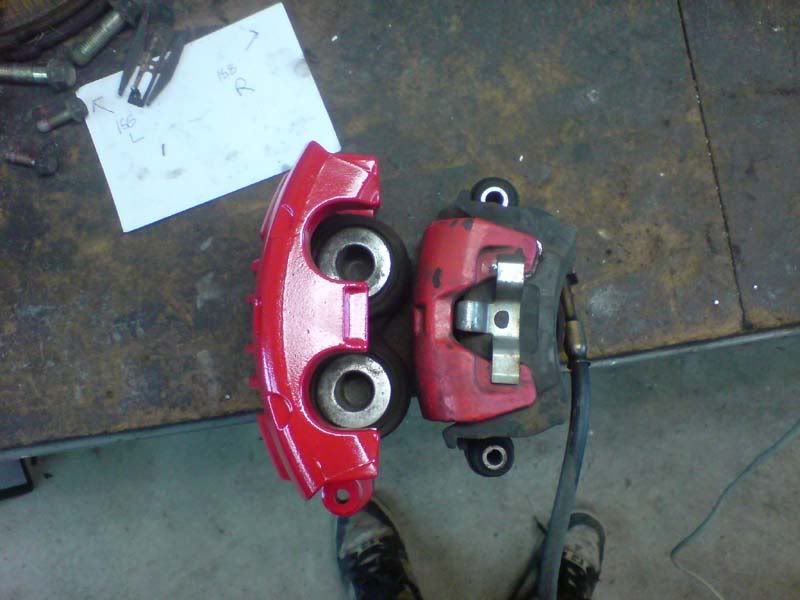
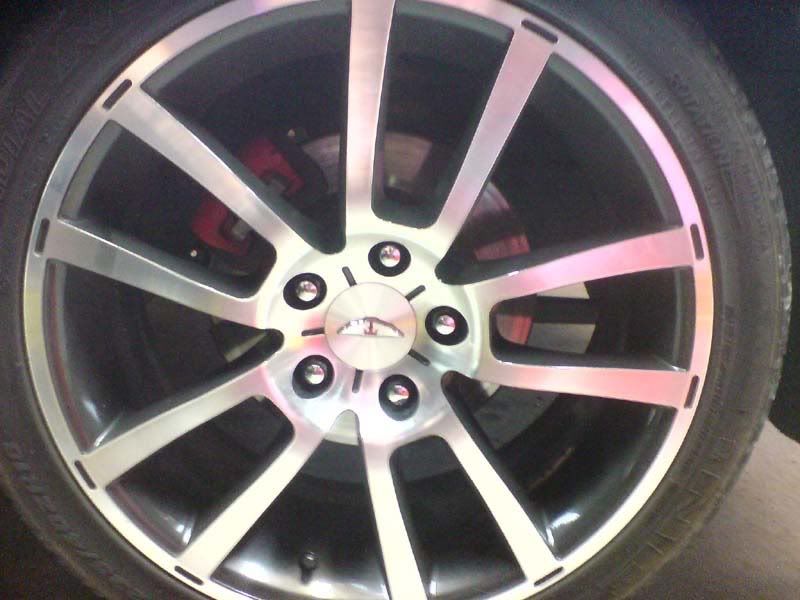
Where the advantage is in the series 2/3 braking system is in the caliper. Series 1 is a single piston, Vs the series 2/3 twin piston. Ill let the pics tell the differences.
 Pedal Feel
Some people who have completed this conversion, have noticed spongy brakes, due to the brake booster being mismatched to the braking system (it is different for the series 2/3). People have reported their spongy pedal disappearing after fitting braided lines.
My experience is not that theyre spongy, my brakes have a come up well to a rather good pedal, but the pedal needs to be moved further for the brakes to initially work. This makes sense due to having to move more fluid into the caliper for them to work.
I will eventually change the booster, once the rear calipers have been upgraded.
Fitting time
It took an evening for me to remove the series 1 gear, and under a day to install the au2/3 gear, bleed, and have the car back to working.
As a comparison, JC took 11 hours to complete the conversion.
Whats needed
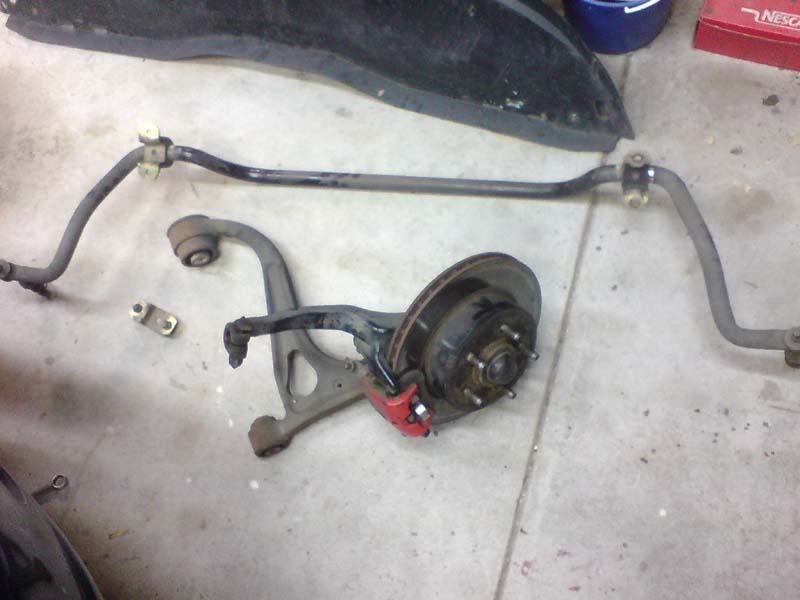
Whats in these pictures is pretty much what is needed:
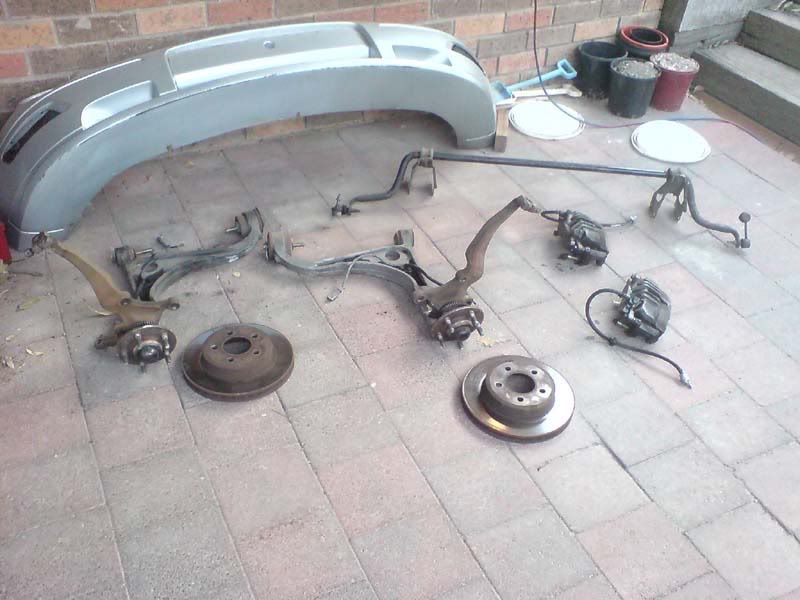
That is:
Lower Control arms
Uprights + Hub(wheel bearings)
Sway bar + links
Sway bar mounts
Calipers + lines
Discs + pads
And the things that dont come in the conversion that are needed:
Bottle or two of brake fluid of choice
Dont mix brake fluids. If you dont know what is in your car, flush/change the whole lot
4 8mm*100mm long
high tensile bolts + 4
NYLOCK nuts + 8 washers
These are to mount the sway bar, as we cant use the factory mounting points.
Nylock nuts are important as they are a locking nut, thus wont come undone
Its best to source this stuff from a bolt store/supplier if there is one near you. For me, these parts cost under $10 for the lot.
Loctite + grease
Plus all the tools needed (obviously)
WARNING
The braking system in your car is not to be taken lightly. It is a vital component to have working. Thus, only attempt the conversion yourself at home, if you are confident with your abilities.
Any doubt, get someone else to install the conversion
Seriously, I cant stress this enough. This guide is only meant to be a supplement, much in the same way a Gregorys/Elerys manual is.
The Conversion
Before starting, if you want to paint the calipers and discs its best to paint them before starting this conversion, or doing it while you are removing the series 1 components.
Also, I'm not going to mention when and where to loctite/grease. If you know enough to do the conversion, you'll know where/when to use this stuff
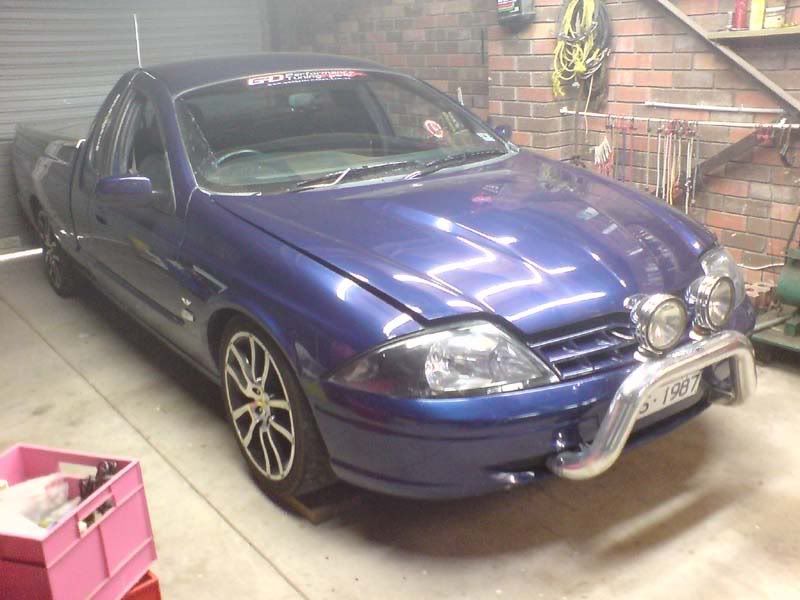
The candidate : A series 1, 1999 ute (an early au ute model)
What your going to try and remove.
Firstly, get the car up in the air, supporting it with jack stands under the chassis rails. Remove both front wheels and place them under the chassis behind the stands (just in case). Remove the stone tray as this stage as well.
Meet you enemy.
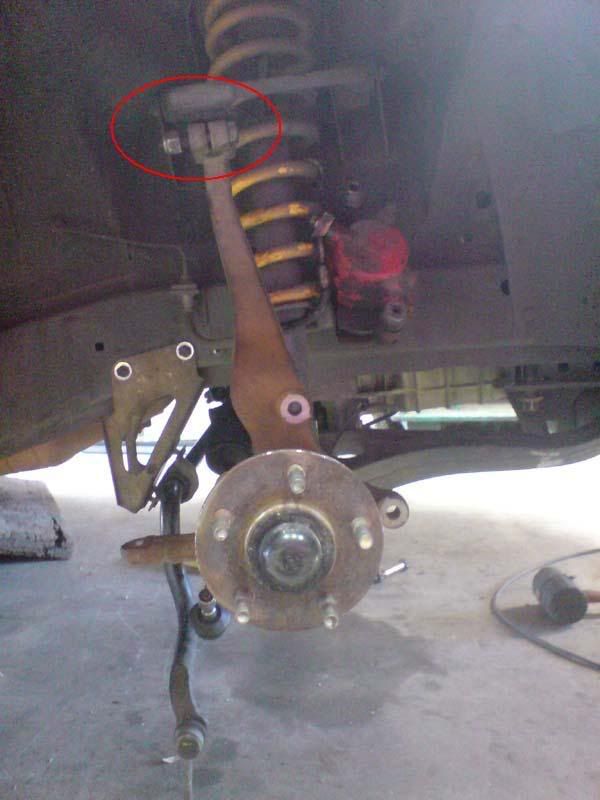
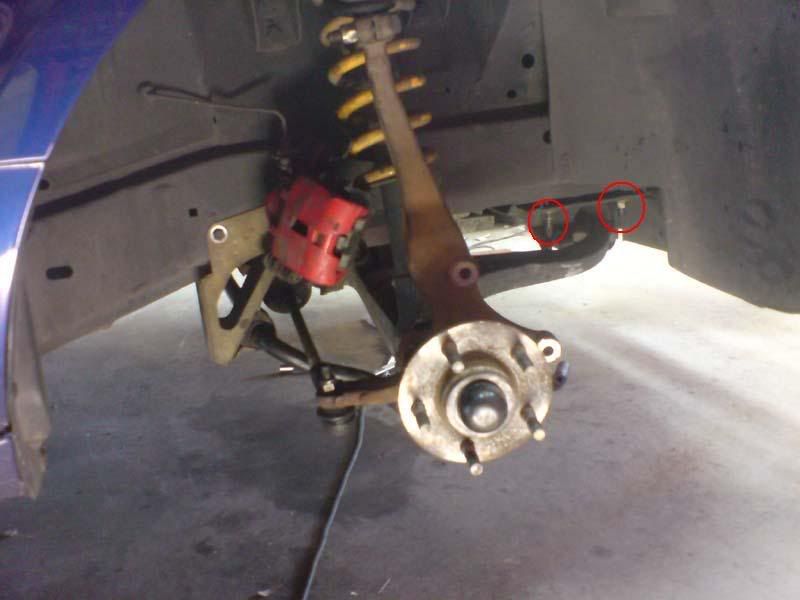
Disconnect the sway bar link from the upright. It should be a 14mm nut. Do this on both sides of the car.
Disconnect the tie rod (steering rack) from the steering arm/upright. You should need a 18mm ring spanner to undo the nut, and a 8mm open ended spanner to hold the ball joint still while the nut is being undone. Once undo done it will probably need some light persuasion to come out.
Next, undo the 4 bolt and nut combos on the lower control arms (2 on each arm). Undo the nut and remove, but do not take the bolt out yet. The arm needs to say in the car for the time being. The bolt should be 18mm, nut 21mm.
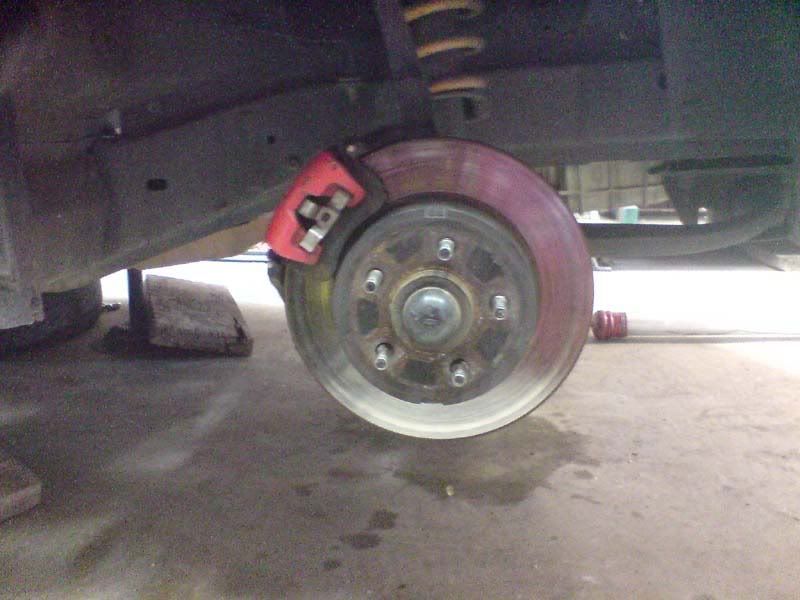
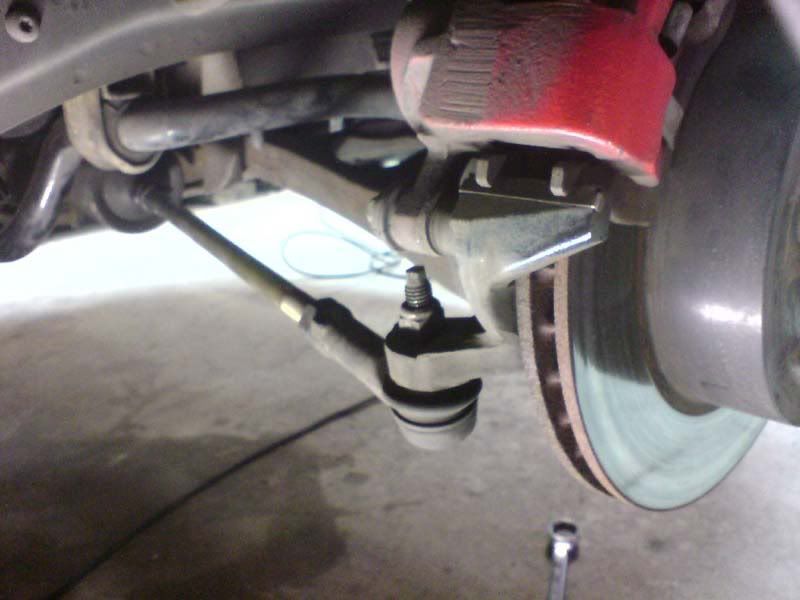
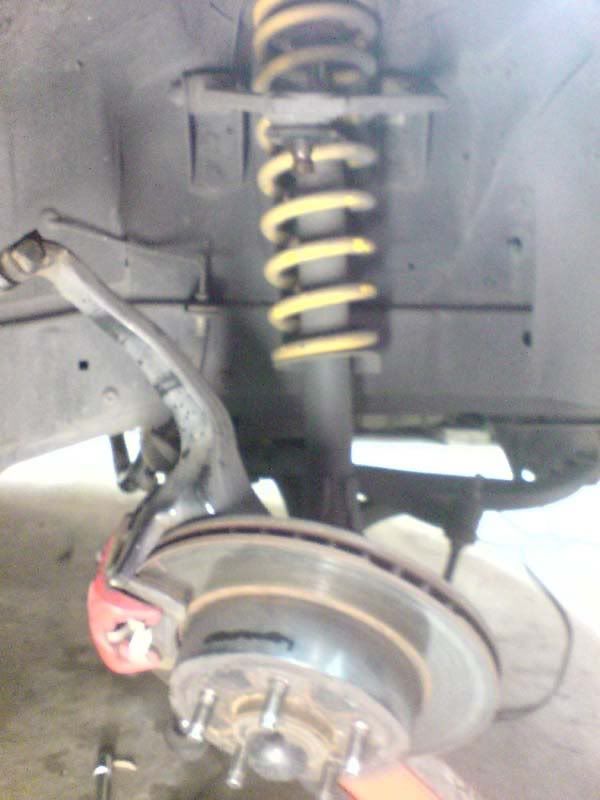
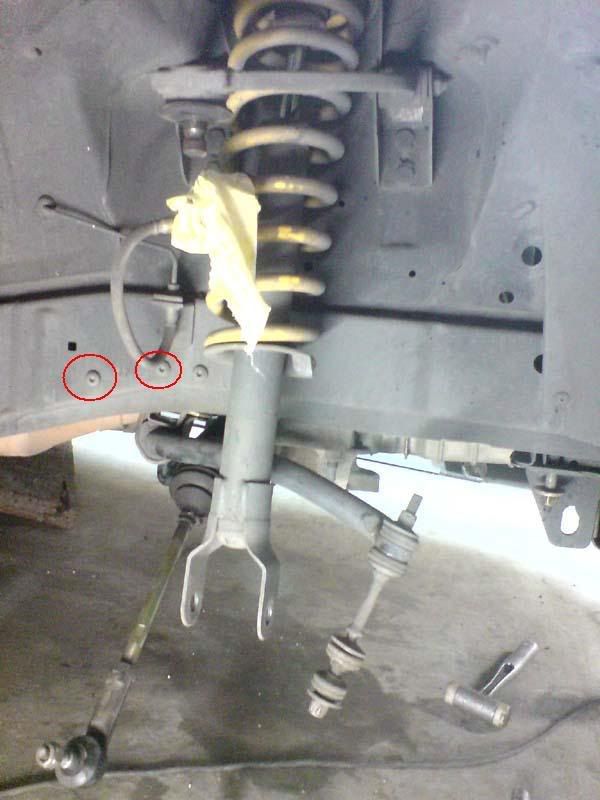
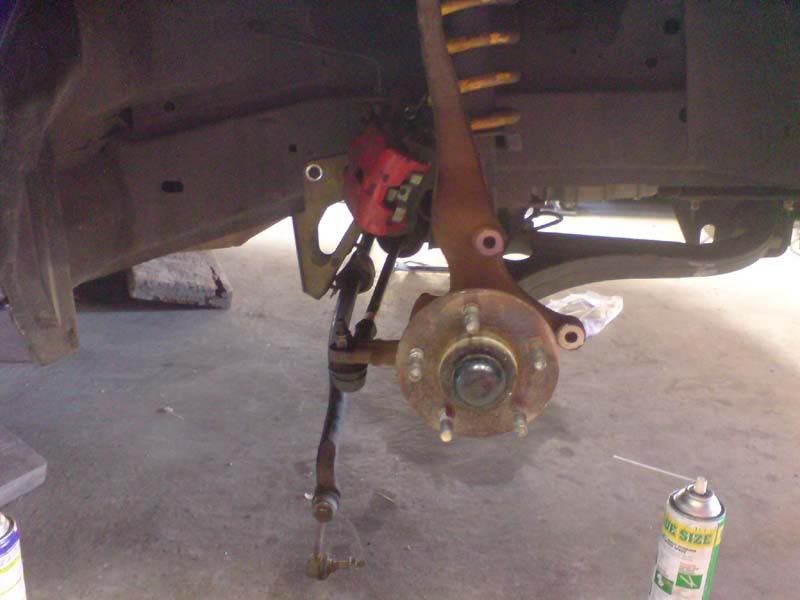
At this stage its best to remove the caliper, with the line still attached, and hang it from the spring. This keeps as much brake fluid as possible in the system until its time to change to caliper/line combo. If you take the caliper off, the fluid will drain out since the reservoir is higher than the end of the line. This is something I didnt figure out till the front end was completely apart. This photo shows what you need to do, but imagine a lower arm and upright in there.
Undo the top ball joint nut/bolt and remove. Swing the top arm up to disconnect it from the upright. Hold the upright while doing this. Should be a 18mm nut
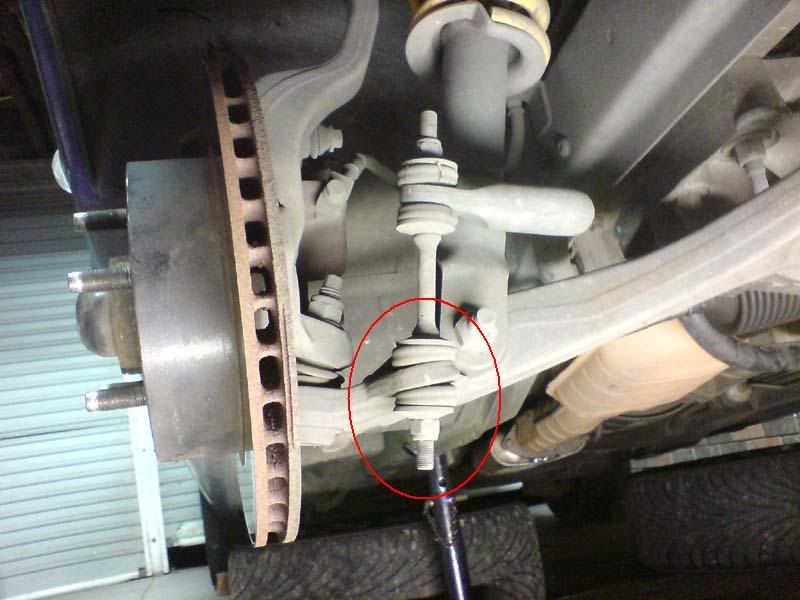
Now using a trolley jack support the lower arm, taking some of its weight, but not much. Loosen the strut bolt. Remove and lower the arm slightly to ensure it is off the strut. The strut bolt and nut should be 22mm nut, 24mm bolt.
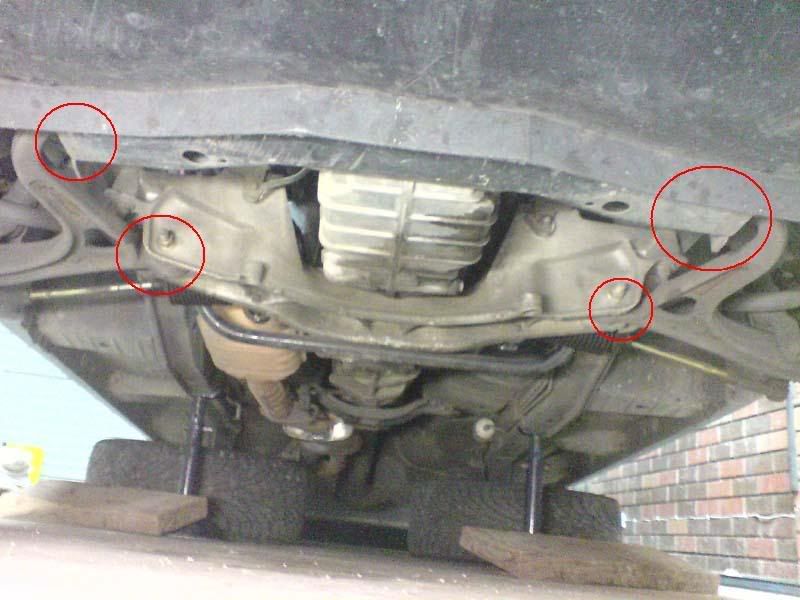
Loosen the front cross member nuts, to the point where they are almost off. This is needed to be able to remove the arm from the car. You may need to take the nuts off, only on one side and drop that side of the cross member when you remove the arm (I cant remember if you need to do this or not, dont think so)
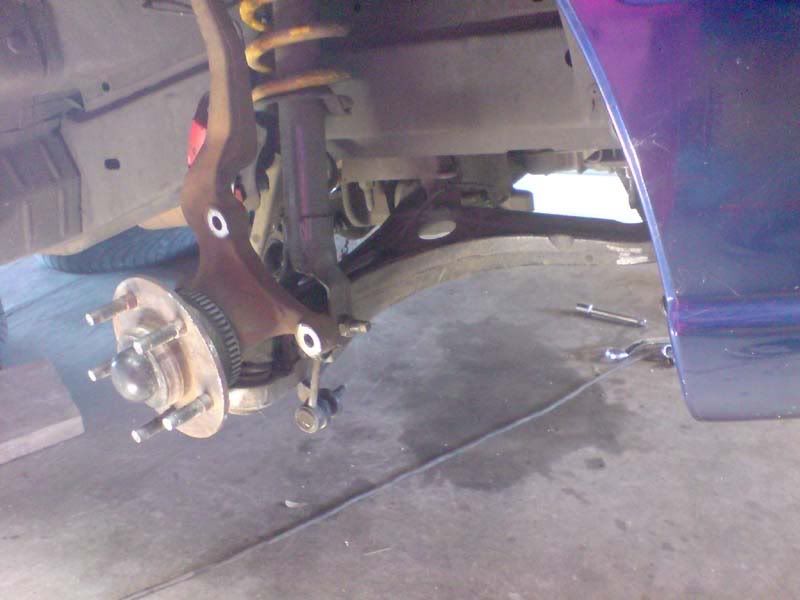
Now its time to remove the arm/upright assembly. Remove the bolts from the end of the arm, in each of the cross members. Persuasion will probably be needed since they are supporting weight. Move the entire arm/upright assembly away from the car on the jack, supporting (holding) the arm near the chassis. Once clear, lower the jack and place the assembly on the ground, clear from where you are working. You will be left with this.


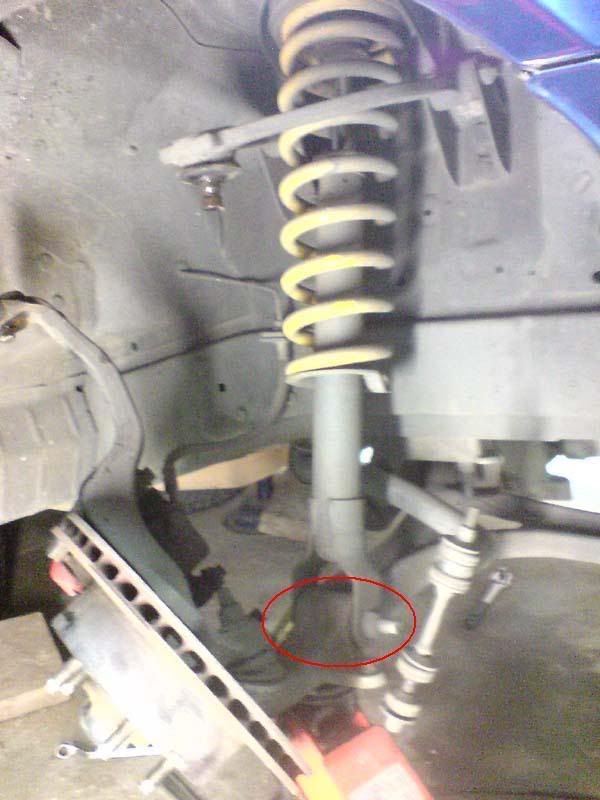
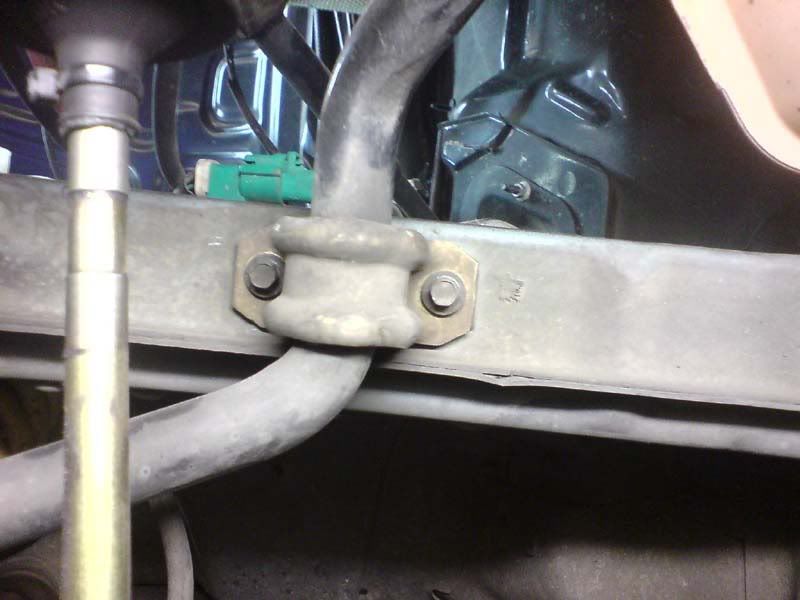
Remove the sway bar now. This is done by undoing 4 bolts (2 sets of 2) that hold the sway bar mounts over the bar, to the car. Support while doing this, then maneuver round the remaining suspension to remove it from the car
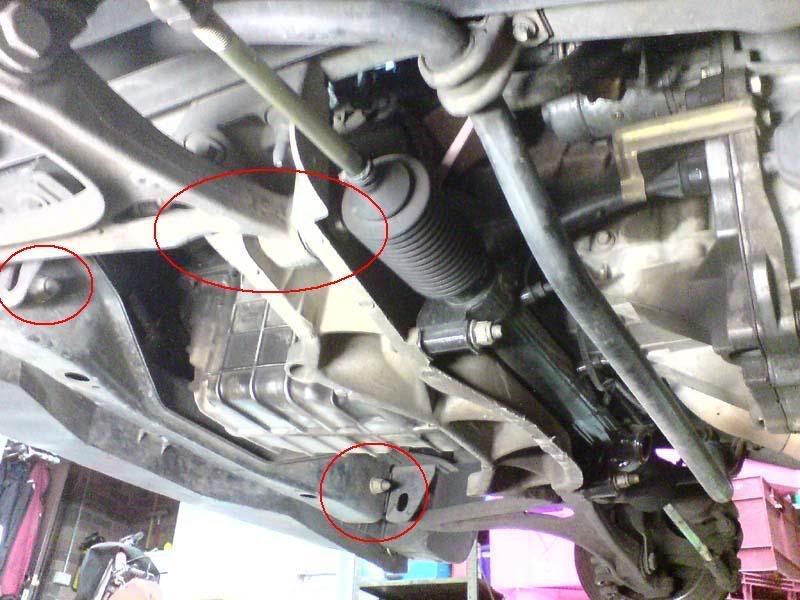
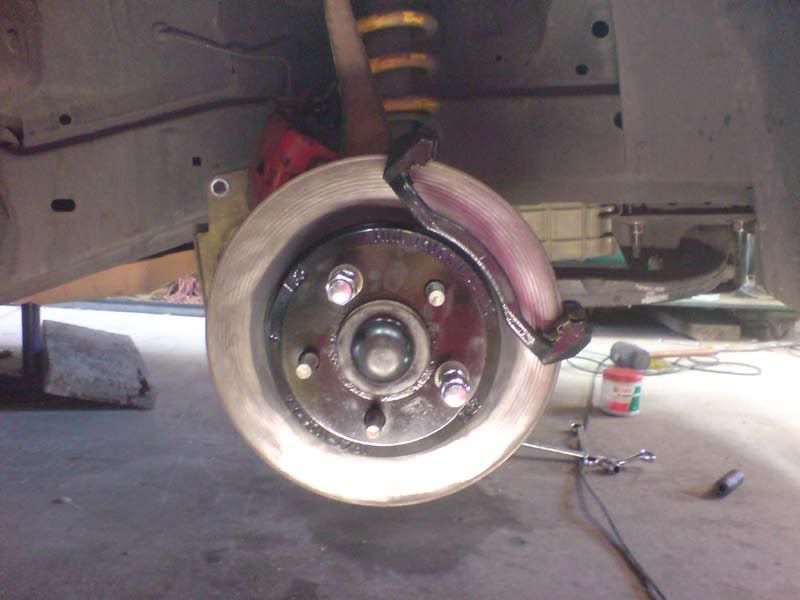
You will now have this.
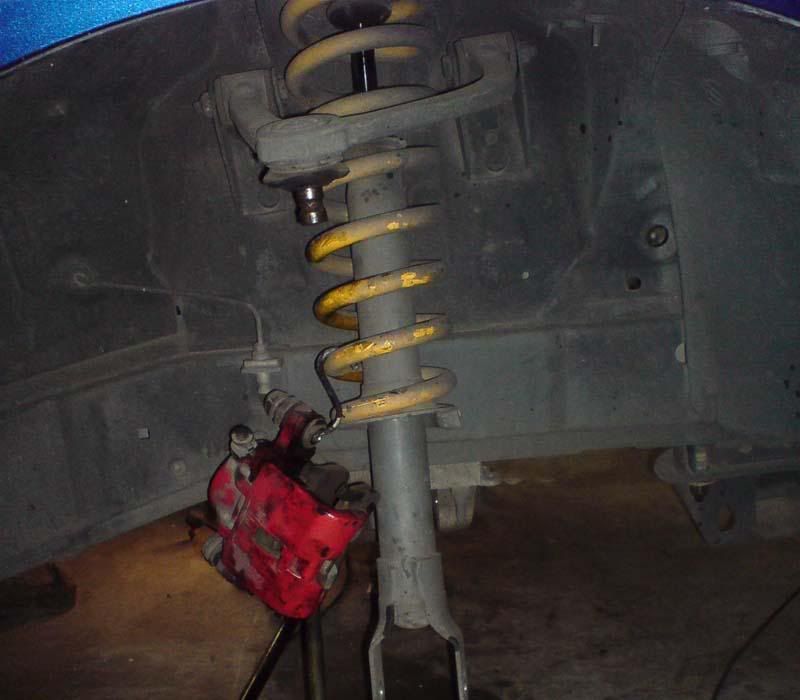
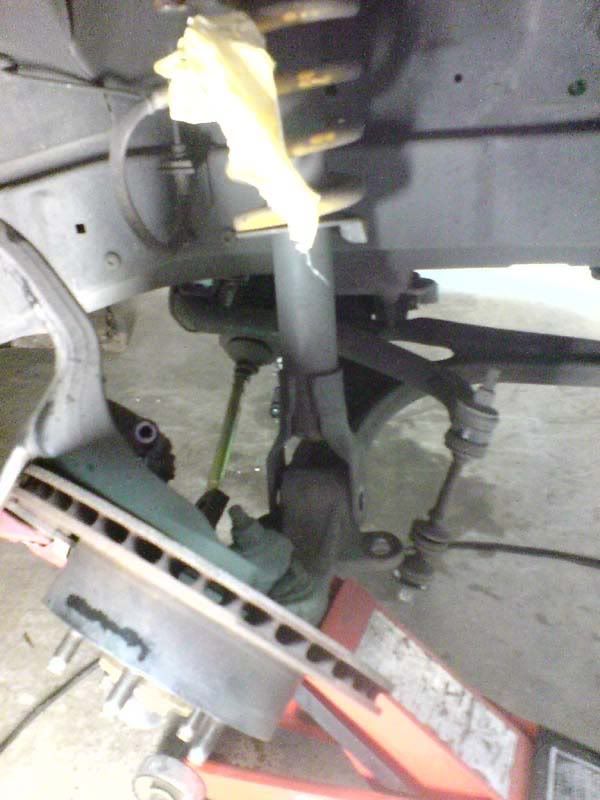
Repeat these steps for the suspension on the other side. You will now have this.
Well Done. Now time to put it back together.
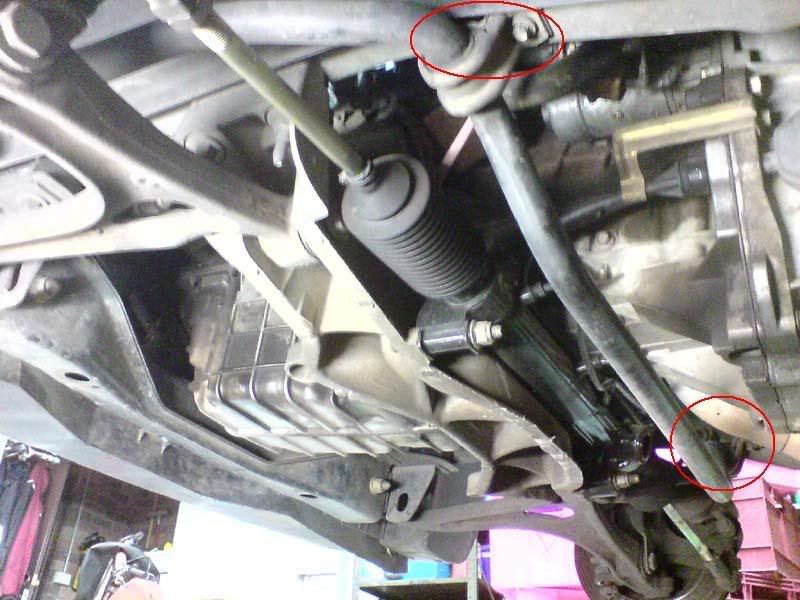
First up is to remount the sway bar. Credit goes to The Monty for this mounting method. You could drill/tap the holes, but I dont believe there is enough metal on the back side (engine side) to tap. This works just as well as the OEM method.
First, remove the blanking bolts in the holes you need. They are a T40 torx bolt, but multigrips or vice grips work just as well.
These holes need to be drilled completely through the chassis. You will be drilling from the wheel well into the engine bay. Use a center punch through the hole, onto the other side of the chassis rail, so that the initial drill bit doesnt slip.
Begin by using a small bit (2mm/3mm). Use this bit gently as they are easy to snap. Drill completely through on both holes. Then step up in drill bit sizes in a few increments (3mm/6mm/8mm ect) until the hole is large enough to fit the bolt through. Mount the sway bar brackets at this stage. Ensure these are done up tight.
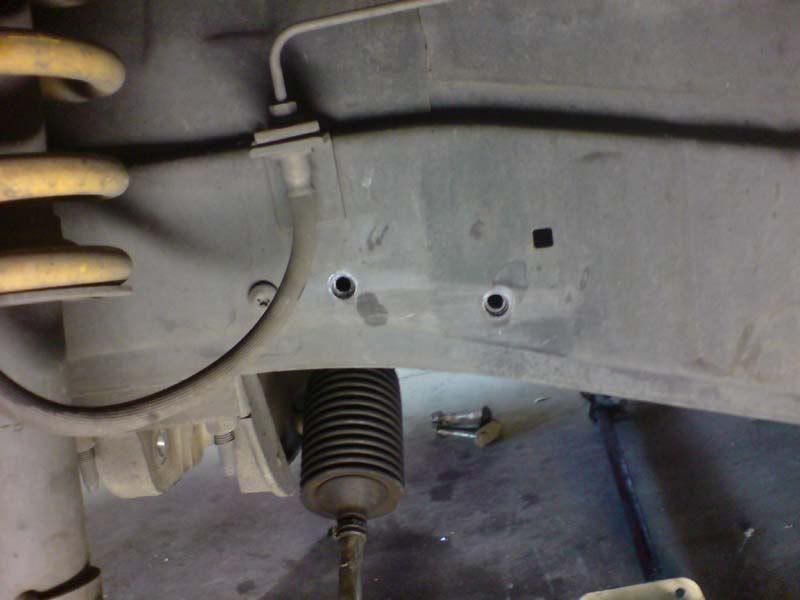
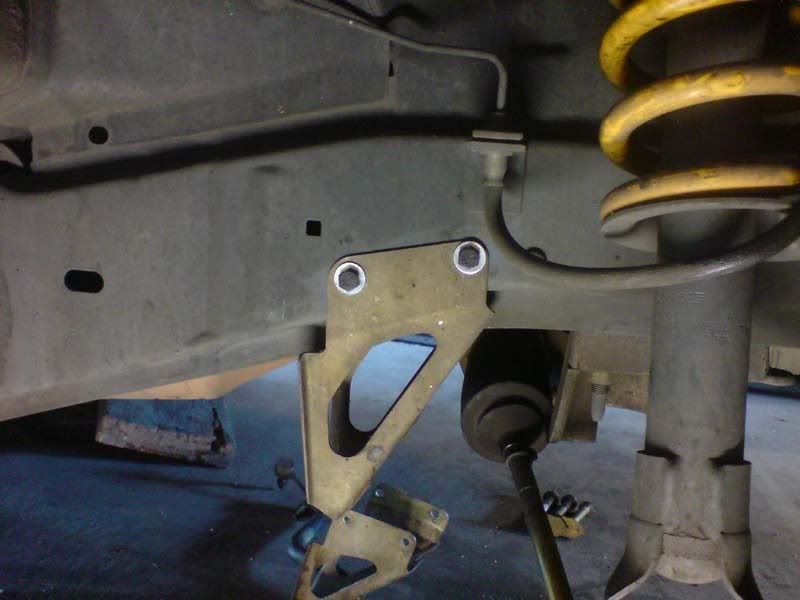
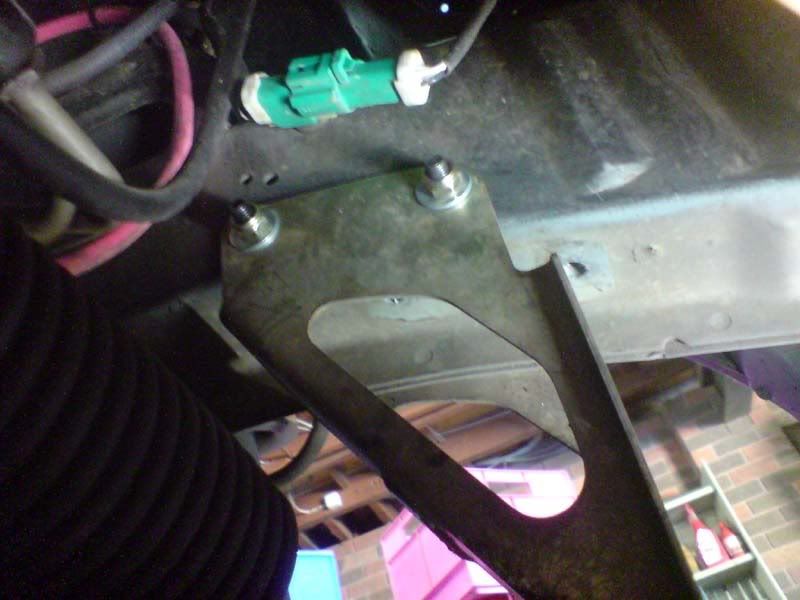
Repeat for the other side and loosely mount the sway bar
Installation of the new suspension is the reverse of the removal method. Until said, loosely tighten all nuts/bolts. The assembly is best to be together before torqueing it all up.
Ensure that the cross member nuts are definitely on and done up slightly
Place the arm and upright assembly on the trolley jack, and raise it to the approximate position that it needs to be in. Slide the end of the arm into the cross members. Install the bolts and nuts on the arm pivots.
Raise the jack to the correct height for the strut, and install the strut bolt. Once done, remove the jack.
Then reconnect the upright to the upper arm ball joint.
Tighten the front cross member nuts back up.
At this stage it is best to toque all the bolt/nuts back up, as the main components are back in and together. The torque values are
Lower arm: 115 Nm *
Cross member: 88 Nm
Strut bolt: 80 Nm*
Top arm ball joint: 90 Nm
* Torque with the weight of the vehicle on the suspension. Easiest way is to jack the car up on the bottom of the arm (same way you installed it), until it is just starting to lift/taking some weight off the jack stands
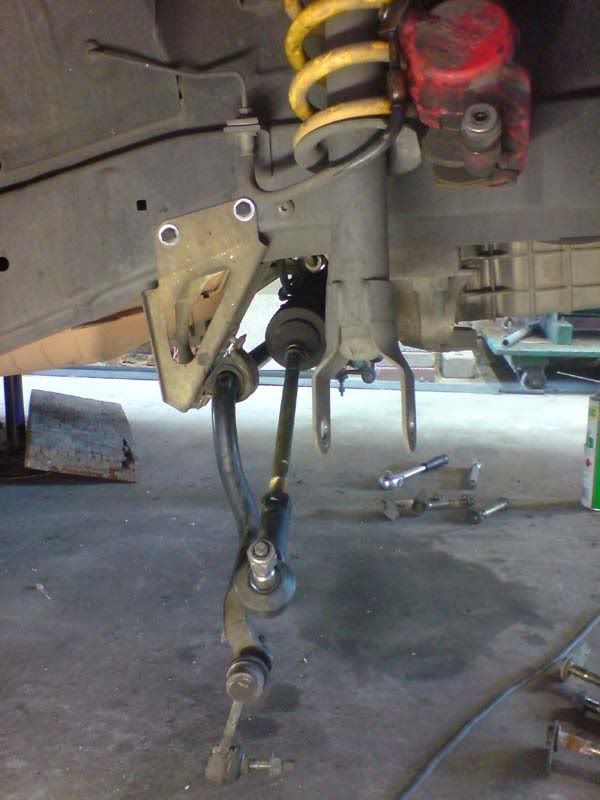
Reinstall the tie rod. Tighten and torque to nut to 55nm
Swing the sway bar up, and connect the link to the upright. Lightly tighten the link nuts. Now tighten and torque the sway bar mount nuts (sway bar to mounts) to 18 Nm. Once done torque the link nuts to 22 Nm
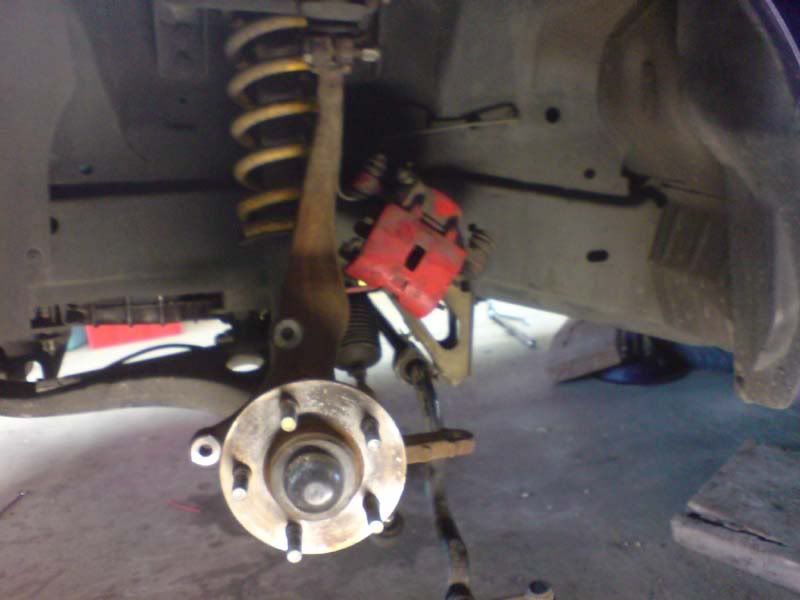
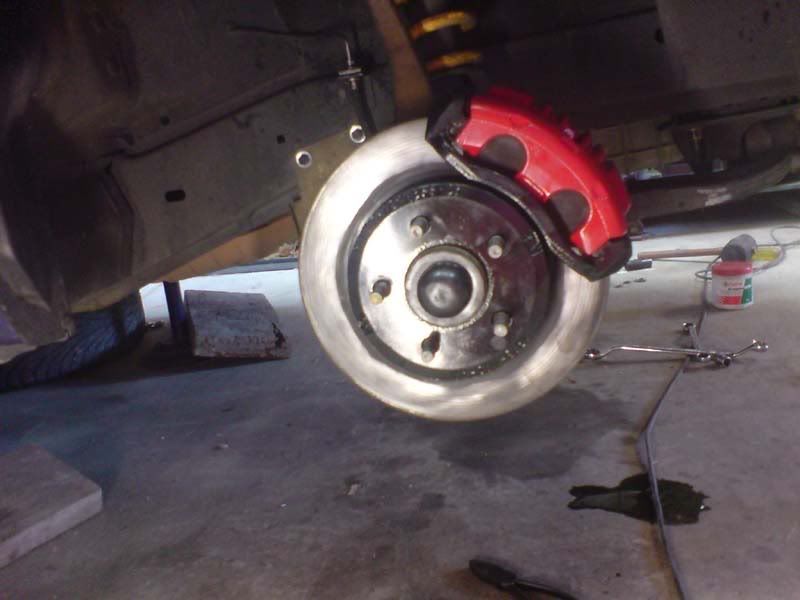
Install a brake disc and use a wheel nut or two to keep it square to the hub. You can now install the caliper carrier.
You can install this carrier first, then caliper later, or the carrier and caliper as one component at once. If installing it as one unit, do not attach them now. Either way leave the caliper off. Torque to 30 Nm for the carrier to upright, and also for the caliper to the carrier.
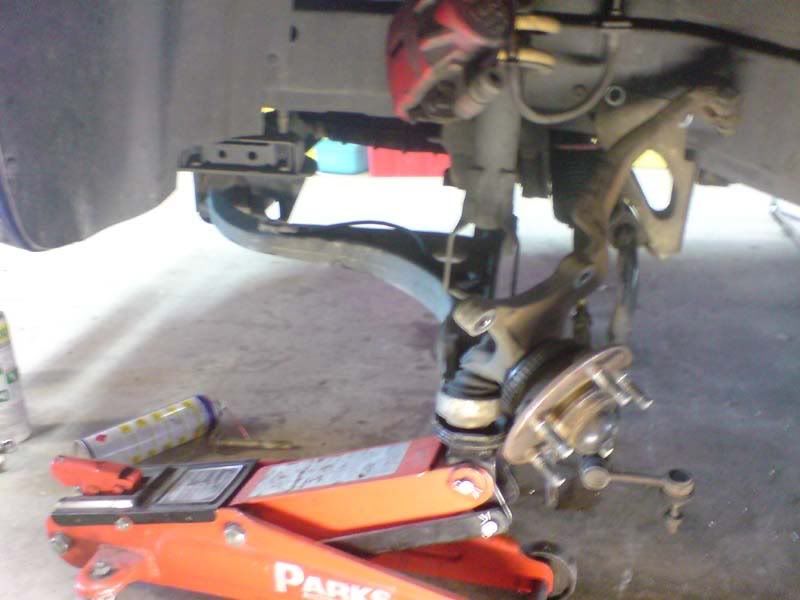
Disconnect the series 1 caliper and brake line, from the hard line in the wheel arch. Seal the end of the line old rubber line (rag wrapped in tape). Remove and place with the old suspension.
Connect the au2 line and caliper to the hard line, ensuring that the rubber line is not twisted. The rubber line needs to run behind the strut. Torque to 30 Nm for the the caliper to the carrier, if not done earlier
An additional note here is that on the series 2/3 strut there is a clip that the brake like clips in to, and is held in place. This can be substituted by the use of 1 or 2 cable ties. However I was/am happy with how the line sat without this clip, and like this it did not foul or catch on anything, hence I have not secured the line to the strut. It is personal choice what you do here
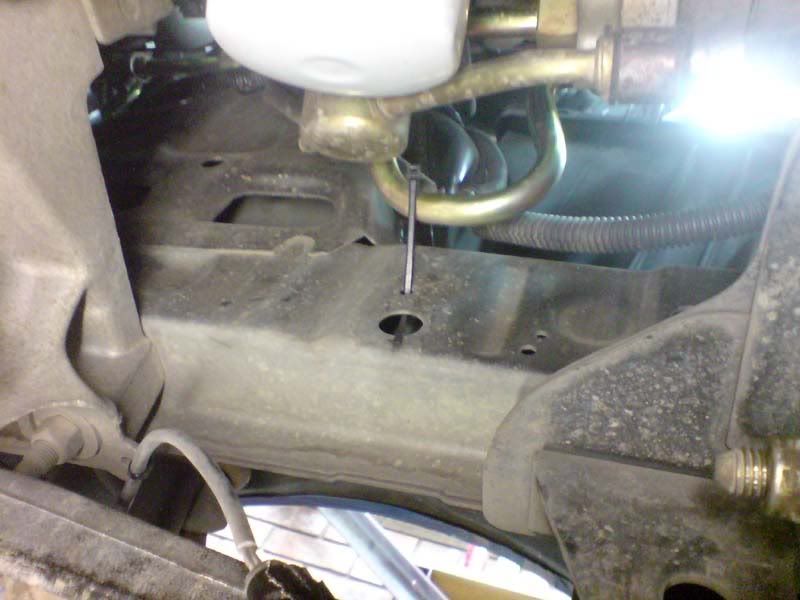
If you conversion came with an
abs sensor, but you dont have
abs sensor follow this step, other wise skip.
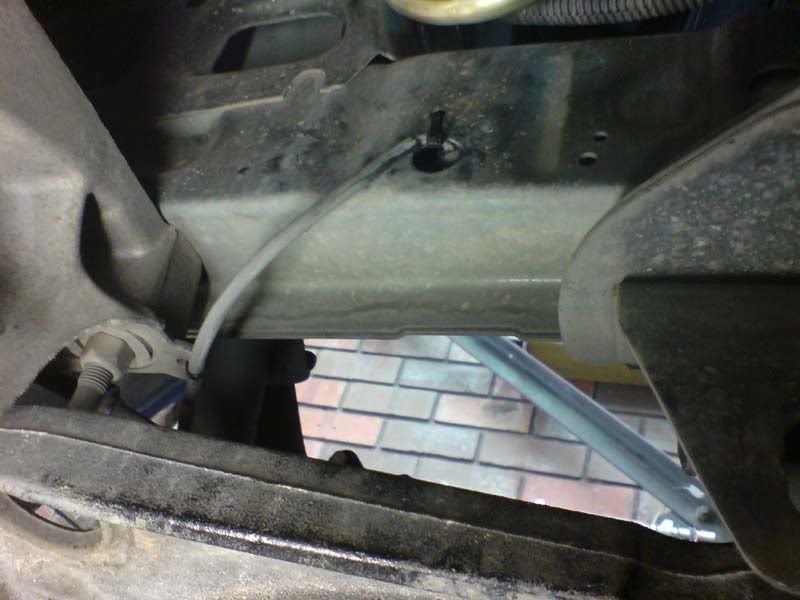
Since there is no connection for this to connect to, alternative measure must be taken. I found this hole in the chassis rail rather convenient. Cover the plug in race/electrical tape. Cable tie to plug into this hole, and cable tie the cable to the alloy cross member.
Bleed the brakes. If you know what fluid is in your car and are using the same type, you only need to bleed the fronts. However, if you dont know what fluid type is in there, replace the lot and bleed all four corners.
Reinstall the rims and stone stray. Lower your car to the ground.
You can smile now as you done, for a few day at least. In this time get a wheel alignment.
After a few days of usage, put the car back on stands and remove the wheels. Recheck and re-torque all bolts and re-bleed the brakes. After this recheck the bolts at your next service, and bleed then aswell if you wish.
Where to from now
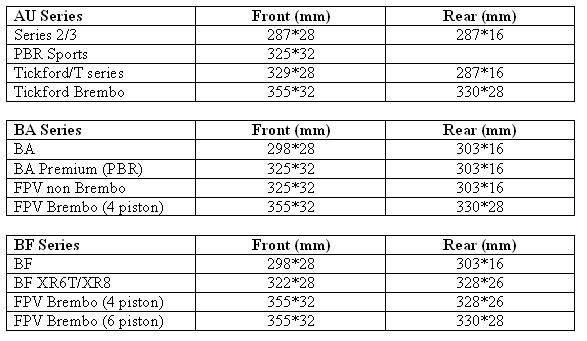
This chart shows Ford's OEM brake fitment. Any of these calipers will now fit, providing you get the mounting bracket/carrier to suit.
Additionally, there are numerous aftermarket brake kits that will now fit. AP racing, brembo's, alcon brakes are just a few I can think of now. Because of the amount there are, I won't list them here.
By installing this front suspension, you are now running the same basic components as what the BA and BF use.
This means that any caliper from a AU/BA/BF will successfully fit onto this suspension, as long as it has the correct carrier (mounting bracket) and the correct discs. Bar au series 1. Even the series 1 premium setup will no longer fit. Nor will teritory brakes fit on the front.
An additional note here, is that I have herd that the brakes lines on the BA/BF calipers are shorter than that of AU2/3. So if upgrading your brakes it would be worth checking this before using the new lines
Additionally any sway bar from AU/BA/BF can now fit as well.
Many of these components are only sold as BA/BF components, but the series 2/3 suspension is the same unit, hence they will now fit.
Have fun with this guys.
Cheers
Ben