
|
|

|
|
|
|
Welcome to the Australian Ford Forums forum. You are currently viewing our boards as a guest which gives you limited access to view most discussions and inserts advertising. By joining our free community you will have access to post topics, communicate privately with other members, respond to polls, upload content and access many other special features without post based advertising banners. Registration is simple and absolutely free so please, join our community today! If you have any problems with the registration process or your account login, please contact us. Please Note: All new registrations go through a manual approval queue to keep spammers out. This is checked twice each day so there will be a delay before your registration is activated. |
|
|||||||
 |
|
|
Thread Tools | Display Modes |
 20-07-2016, 01:09 AM
|
#91 | |||
|
FF.Com.Au Hardcore

Join Date: Nov 2005
Location: perth
Posts: 4,355
|
Quote:
__________________
yes still (as money n time permit) doing the rebuilding the zh fairlane with a clevo 400m 4v heads injected whipple blown with aode 4 speed trans to a 9" ....... we'll get there eventually just remember don't be afraid to try something new. Remember, amateurs built the Ark...Professionals built the Titanic! I have taken up meditation... at least it's better than sitting around doing nothing !! |
|||

|

|
|
20-07-2016, 10:13 AM
|
#92 | |||
|
Regular Member

Join Date: Mar 2007
Location: Melbourne
Posts: 135
|
Quote:
The only reason I haven't drilled & bolted the additional two holes up on the brackets is I'm deciding if bolting is the way to go or if I weld them on instead.
__________________
4.2 Supercharged V8 RangeRover Sport - Daily driver 1975 XB Fairmont GS Coupe - Ford Weekend Toy 1975 XB Falcon 500 Coupe - Undecided Project 1972 Dodge Challenger R/T - Mopar Weekend Toy 1969 GTO - Pontiac Weekend Toy |
|||
|
|
|
|
20-07-2016, 10:14 AM
|
#93 | |||
|
Regular Member
Join Date: Mar 2007
Location: Melbourne
Posts: 135
|
Quote:
__________________
4.2 Supercharged V8 RangeRover Sport - Daily driver 1975 XB Fairmont GS Coupe - Ford Weekend Toy 1975 XB Falcon 500 Coupe - Undecided Project 1972 Dodge Challenger R/T - Mopar Weekend Toy 1969 GTO - Pontiac Weekend Toy |
|||
|
|
|
|
21-07-2016, 10:30 PM
|
#94 | ||
|
Regular Member
Join Date: Aug 2005
Posts: 64
|
i thought you may have been, but sometimes on the internet these things get misconstrued and people get ****ed off.
Regarding the bolting vs welding argument it really is personal preference Bolting is easier to fix in the event of any repair needed and is easier to return to stock obviously. Bolting also bridges both sides of the rail and its normally harder to pull a bolt through something then tear. This is still relying on the original rail to be in good condition and not reduced in thickness. Welding would mean there would be no slippage or twisting of the brackets against the bolts. It spreads the load around the whole circumference of the bracket as appose to the bolts point loading. But this is a surface area equation of bolt support vs weld area Downside is if it isn't welded correctly could create a stress raiser or weak spot and could cause the metal to tear in the event of a accident, bump steer or through excessive steering effort. |
||
|
|
|
|
22-07-2016, 11:45 AM
|
#95 | ||
|
FF.Com.Au Hardcore

Join Date: Feb 2015
Posts: 700
|
Why not both bolt and weld?
A few decent tack welds around the plate that could be easily removed if necessary and bolts for the extra security! If I was just going to weld the plate in place then I'd definitely drill holes in the bracket and plug weld it on. Cheers! |
||
|
|
|
|
22-07-2016, 05:12 PM
|
#96 | ||
|
Regular Member
Join Date: Mar 2007
Location: Melbourne
Posts: 135
|
Yeah I was thinking of drilling some holes in the bracket & plug welding it, but I guess I want to be able to easily remove it should I ever want/need to.. So I think I'll bolt it up & just place a few stitch welds around the edges that can be ground off easily if needs be
__________________
4.2 Supercharged V8 RangeRover Sport - Daily driver 1975 XB Fairmont GS Coupe - Ford Weekend Toy 1975 XB Falcon 500 Coupe - Undecided Project 1972 Dodge Challenger R/T - Mopar Weekend Toy 1969 GTO - Pontiac Weekend Toy |
||
|
|
|
| This user likes this post: |
|
31-07-2016, 01:44 AM
|
#97 | ||
|
Regular Member
Join Date: Mar 2007
Location: Melbourne
Posts: 135
|
I decided it was time to test fit the engine, so that I could then test fit the new much bigger extractors & make sure that everything was going to fit ok or find out now before the car is painted if any body modifications need to be made.
I was never going to use the old thick rubber engine mounts that came out  I have a new set of Tough Mounts (that’s the brand, not just a description) for the replacement of both the engine mounts & the gearbox mounts   With the mounts bolted up it was time to swing the engine in   After a little bit of time I decided that whilst it might be cool to own the world’s only transverse mounted V8 XB it was probably going to be easier to just mount it normally   It looks nice to have an engine back in there again & it’s a great looking engine, even if I do say so myself… the driver’s side engine mount bolt just slid in, but the passenger side one just wouldn’t line up for me & it was getting late & I was getting tired, so I just left it sitting flush on the car mount  
__________________
4.2 Supercharged V8 RangeRover Sport - Daily driver 1975 XB Fairmont GS Coupe - Ford Weekend Toy 1975 XB Falcon 500 Coupe - Undecided Project 1972 Dodge Challenger R/T - Mopar Weekend Toy 1969 GTO - Pontiac Weekend Toy |
||
|
|
|
| 3 users like this post: |
|
31-07-2016, 01:47 AM
|
#98 | ||
|
Regular Member
Join Date: Mar 2007
Location: Melbourne
Posts: 135
|
Next day I tried a method a mate told me to try & I loosened off all four bolts that hold the body side of the engine mount to the cross member & that made all the difference, just that extra mm or 2 of movement made the job of getting the passenger side mount bolt in.. too easy
  With the engine in place I have clearance between the sump & the cross member.. not heaps, but I can get my fingers in the gap so I’m happy with that   The back of the sump also clears the rubber gator of the steering rack by about 5mm now & the back of the engine should come up one the transmission is installed & it’s cross member pulls the back of the engine up  Next job was to bolt on the new extractors, they are just a little bigger in diameter that then outgoing ones, I’m confident that they’ll fit no issues in the engine bay… but the big unknown for me was how they would route past the steering rack on the way out  Clearance between the block & the passenger side tower is fine as expected (I’m still in two minds as to cutting the towers out to give more room for cooling & ease of access or not, genuinely don’t know which way I’ll go there)   More importantly clearance of the passenger side extractor over the steering rack is great 
__________________
4.2 Supercharged V8 RangeRover Sport - Daily driver 1975 XB Fairmont GS Coupe - Ford Weekend Toy 1975 XB Falcon 500 Coupe - Undecided Project 1972 Dodge Challenger R/T - Mopar Weekend Toy 1969 GTO - Pontiac Weekend Toy |
||
|
|
|
| 2 users like this post: |
|
31-07-2016, 01:48 AM
|
#99 | ||
|
Regular Member
Join Date: Mar 2007
Location: Melbourne
Posts: 135
|
The driver’s side extractor is always more of a pain to get in place, I had thought that with the steering box out of the way it would be easier but the brake booster still makes it a pain compared to the passenger side…. But no clearance issues
 It clears the uni-joints for the steering well too  Clears the rack nicely too  They are bloody wide pipes, it might be fun yet getting them fitted in when they have to wrap around the transmission too  With the engine & extractors all in I decided to refit the brace kit & fit up the carb to see what the top of the engine bay will end up looking like & make sure that it will all fit under the bonnet line   Next job is the fun of trying to fit all the accessories to the front of the engine, so because this is not a stock block or stock heads & because I’ve gone with an electric water pump & not the factory style & I currently have some fancy aftermarket mini power steering pump…. Well there are just no off the shelf brackets that will bolt up that I can find, I have some choices (as you can see) so I decided to see just how close to making this work I could get  
__________________
4.2 Supercharged V8 RangeRover Sport - Daily driver 1975 XB Fairmont GS Coupe - Ford Weekend Toy 1975 XB Falcon 500 Coupe - Undecided Project 1972 Dodge Challenger R/T - Mopar Weekend Toy 1969 GTO - Pontiac Weekend Toy |
||
|
|
|
| 3 users like this post: |
|
31-07-2016, 01:49 AM
|
#100 | ||
|
Regular Member
Join Date: Mar 2007
Location: Melbourne
Posts: 135
|
Now there us a company that sells aftermarket brackets for Ford engines running electric water pumps, but they are for their brand of electric water pump & that pump is just ever so slightly different from mine, so when I went to bolt the brackets on, they were fouling on the pump casing… now only by a mm or 2, so not the end of the world I was able to just use the polishing wheel on the grinder to take a tiny bit of material off & make the bracket fit
 So close, yet so far  Trying not to completely ruin the shiny bracket   Job done  Now for my big issue with using this style of bracket….. there is no threaded hole in the top of the head to actually bolt the alternator into….  Bugger, so I played with some of the other bits I had & this was the only workable solution I could come up with, bolting the alternator into a threaded hole much lower down on the block itself  Then using an adjustable leg to connect the alt to the bracket  Giving this….   Now this clearly isn’t acceptable.. so I have managed to track down a new mount that is a low slung mount that connects to the bottom of the water pump housing & cradles the alt rather than hanging it from above… so that’s on order now & we’ll see how that works when it turns up.
__________________
4.2 Supercharged V8 RangeRover Sport - Daily driver 1975 XB Fairmont GS Coupe - Ford Weekend Toy 1975 XB Falcon 500 Coupe - Undecided Project 1972 Dodge Challenger R/T - Mopar Weekend Toy 1969 GTO - Pontiac Weekend Toy |
||
|
|
|
|
31-07-2016, 01:50 AM
|
#101 | ||
|
Regular Member
Join Date: Mar 2007
Location: Melbourne
Posts: 135
|
The power steering bracket needed the sort of shaving that the alt bracket needed to be able to bolt onto my water pump
 Now the passenger side head has all of the same threaded holes you’d see on a factory head, so another option could be to look at mounting the alt on the wrong side of the engine  Then I opted to bolt on the new shiny twin pulley as I knew that this would be easy & that would be a shallow enough victory for the day to make me happy  No doubt there will be fun & games setting up the power steering pump too, but that’ll be another day now
__________________
4.2 Supercharged V8 RangeRover Sport - Daily driver 1975 XB Fairmont GS Coupe - Ford Weekend Toy 1975 XB Falcon 500 Coupe - Undecided Project 1972 Dodge Challenger R/T - Mopar Weekend Toy 1969 GTO - Pontiac Weekend Toy |
||
|
|
|
|
03-08-2016, 02:04 PM
|
#102 | ||
|
Regular Member
Join Date: Mar 2007
Location: Melbourne
Posts: 135
|
Just a quick update today…. The new boots for the Coupe turned up, I’ve gone for 245/45ZR17 up front & 315/35ZR17 for the rears
 A quick test fit shows that Ford really did get the rear wheel wells right on this car, the rear suspension leaf springs are stock for now & the Guards are not rolled. As you see 315 fits easy  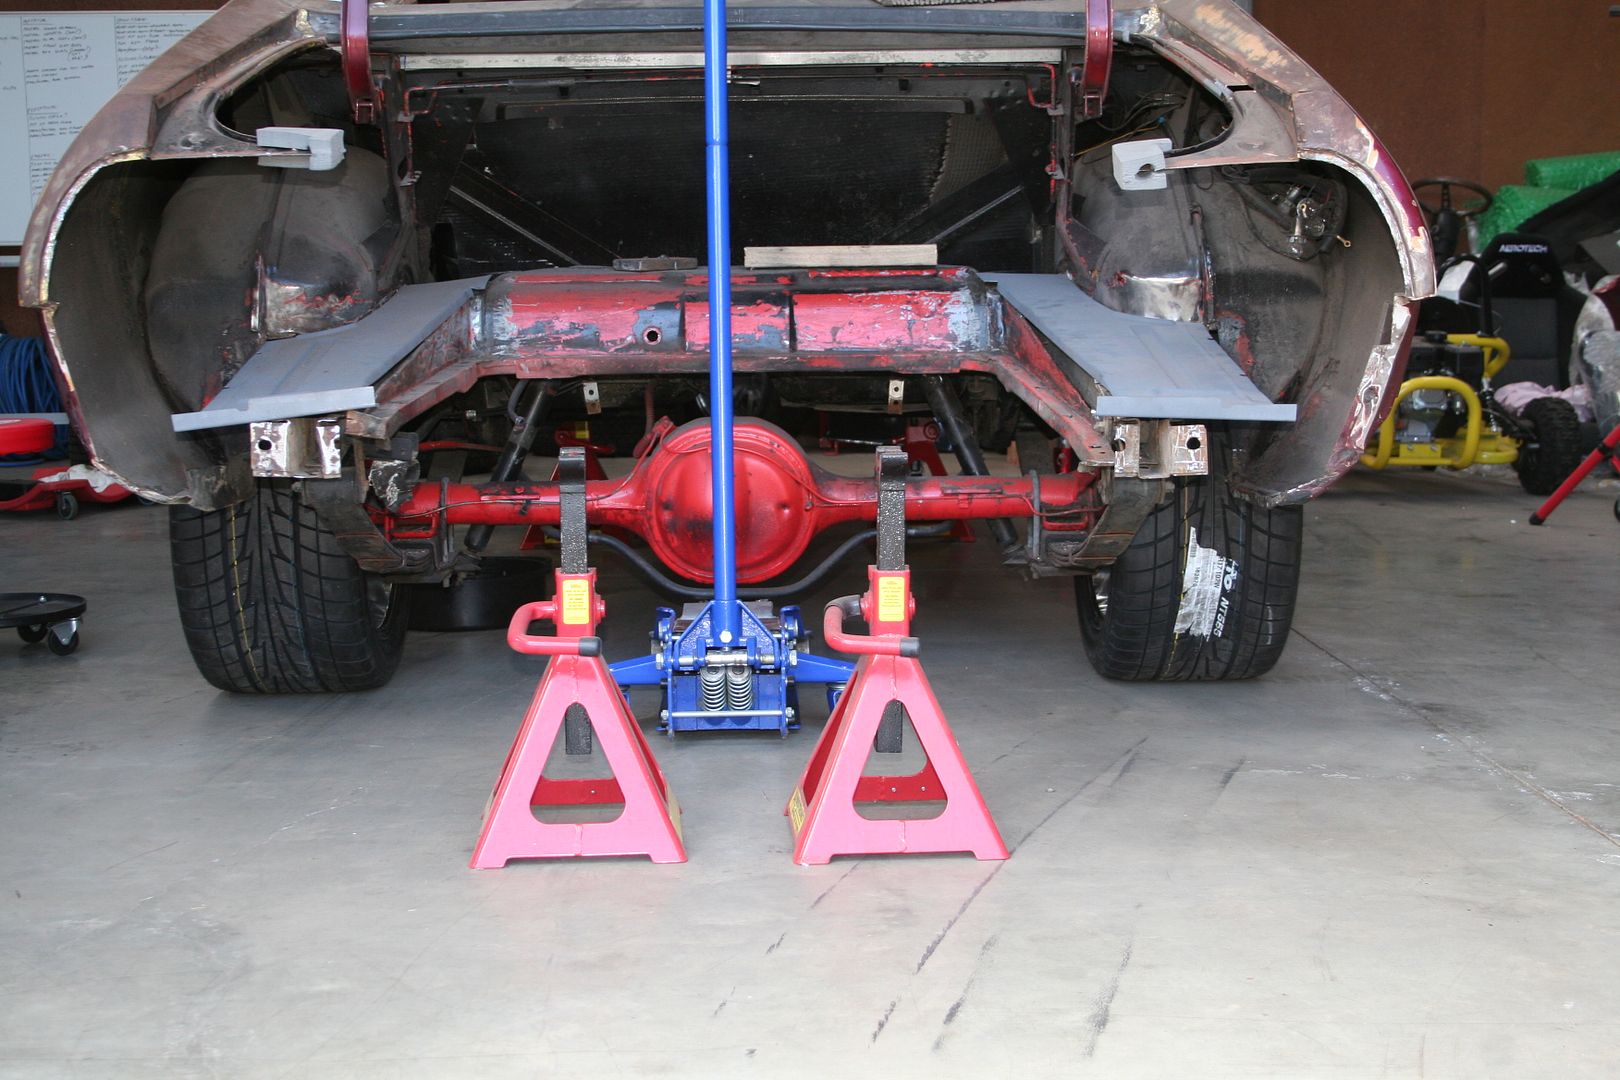 I know that there is no weight in the rear right now but there is plenty of clearance to play with, 20mm from the widest point of the sidewall to the spring (won’t matter to me as I’m removing the springs anyway) 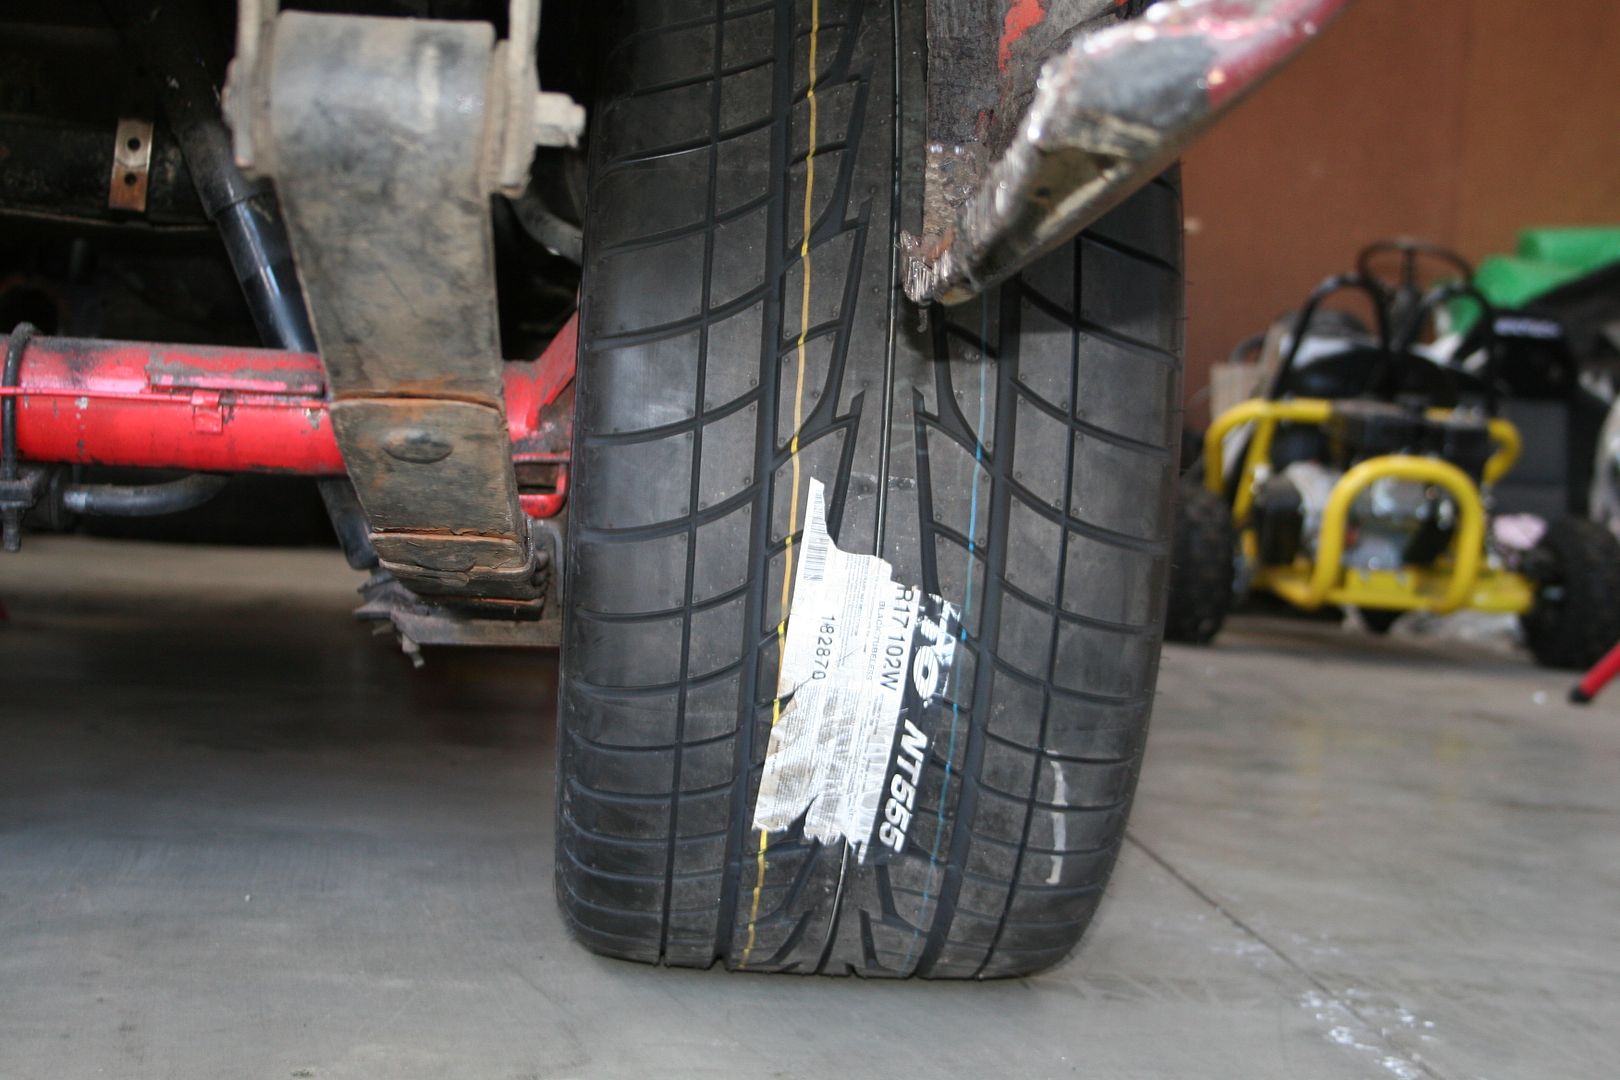  The tire is still within the guard edge too & there will be no need to roll them if I don’t want to (might do it before I paint the car anyway in case I ever go fatter) 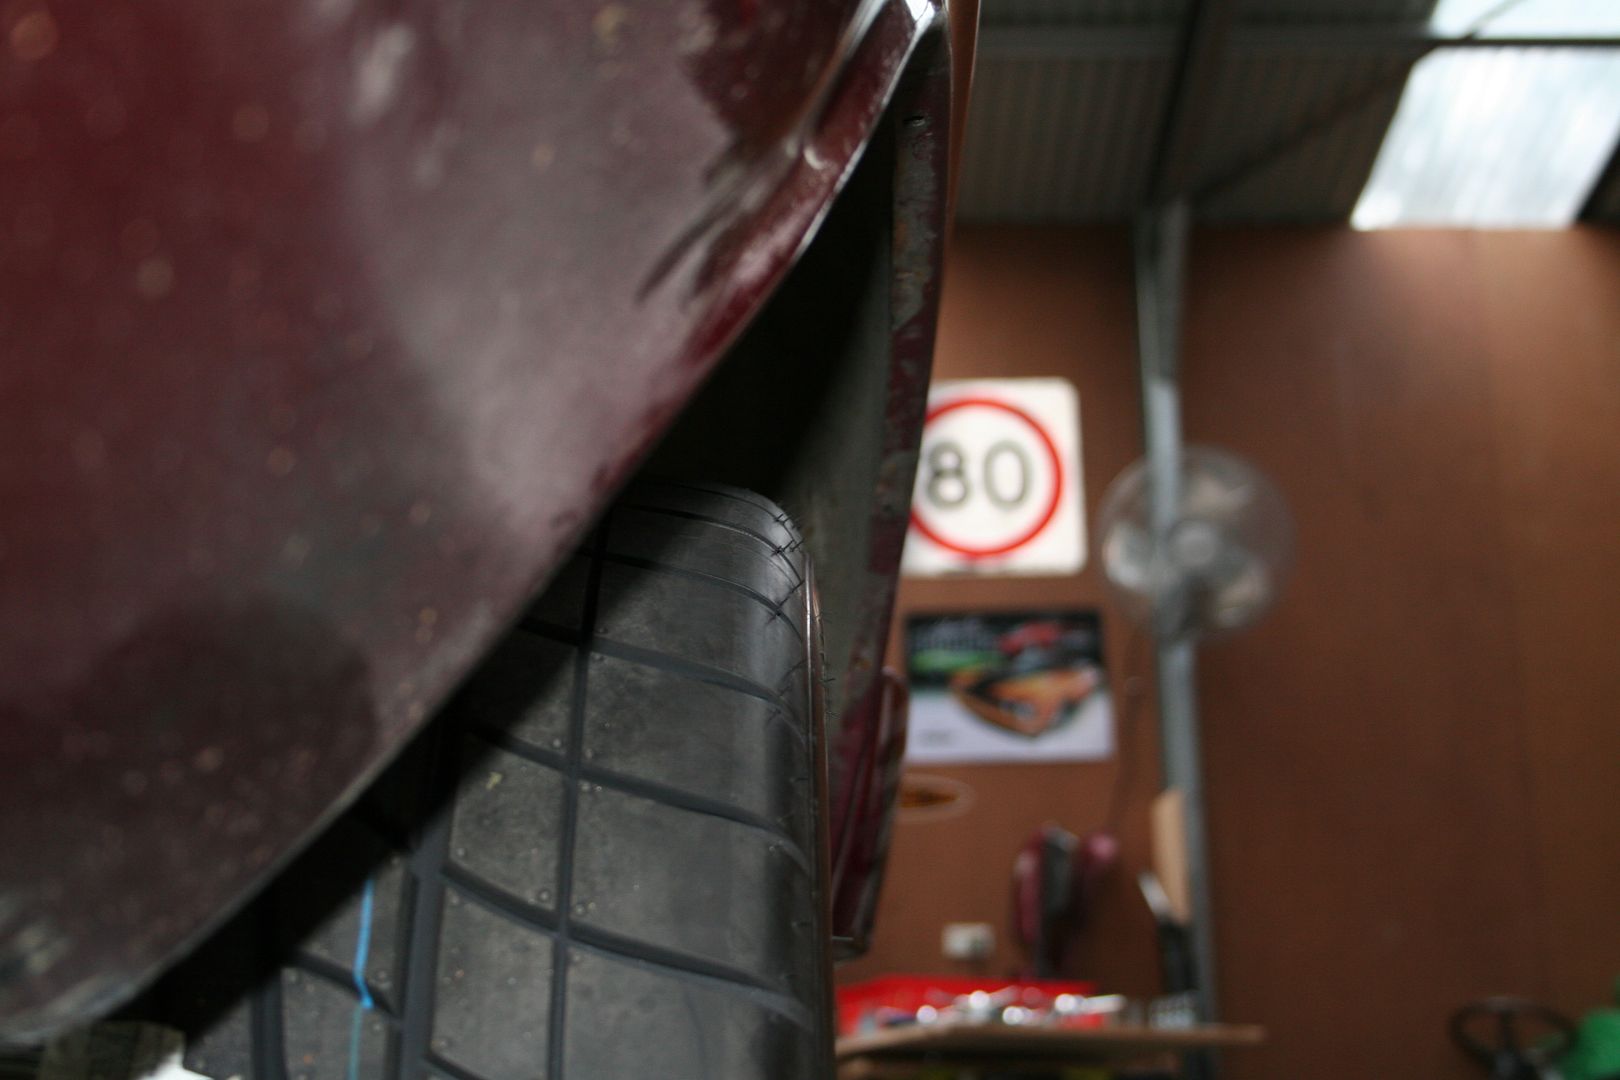    I reckon that 335’s would fit with no mods, they’d scrub slightly but they’d fit & I reckon that 345 would be possible with rolled guards
__________________
4.2 Supercharged V8 RangeRover Sport - Daily driver 1975 XB Fairmont GS Coupe - Ford Weekend Toy 1975 XB Falcon 500 Coupe - Undecided Project 1972 Dodge Challenger R/T - Mopar Weekend Toy 1969 GTO - Pontiac Weekend Toy |
||
|
|
|
|
03-08-2016, 02:09 PM
|
#103 | ||
|
Regular Member
Join Date: Mar 2007
Location: Melbourne
Posts: 135
|
Forgot to say, they are Nitto NT555's.... didn't have a lot of options in the 315/35ZR17 range oddly enough....
__________________
4.2 Supercharged V8 RangeRover Sport - Daily driver 1975 XB Fairmont GS Coupe - Ford Weekend Toy 1975 XB Falcon 500 Coupe - Undecided Project 1972 Dodge Challenger R/T - Mopar Weekend Toy 1969 GTO - Pontiac Weekend Toy |
||
|
|
|
|
04-08-2016, 10:13 AM
|
#104 | ||
|
WT GT
 
Join Date: Jan 2006
Location: The GSS
Posts: 17,599
|
Dave, what rear rims are you running and what's the offset please? I have a set of 15x10 Challengers with only 265 and they scrub like mongrels.
Thanks |
||
|
|
|
|
04-08-2016, 10:26 AM
|
#105 | |||
|
Regular Member
Join Date: Mar 2007
Location: Melbourne
Posts: 135
|
Quote:
So I've just grabbed the invoice for them & I can confirm 100% The wheel is 17x10.5" with a 6" backspace & as above in the tire post, the rubber bit is 315/35R17
__________________
4.2 Supercharged V8 RangeRover Sport - Daily driver 1975 XB Fairmont GS Coupe - Ford Weekend Toy 1975 XB Falcon 500 Coupe - Undecided Project 1972 Dodge Challenger R/T - Mopar Weekend Toy 1969 GTO - Pontiac Weekend Toy |
|||
|
|
|
|
04-08-2016, 10:27 AM
|
#106 | ||
|
WT GT
Join Date: Jan 2006
Location: The GSS
Posts: 17,599
|
Right. Thanks for that. Diff hasn't been shortened?
|
||
|
|
|
|
04-08-2016, 10:33 AM
|
#107 | |||
|
Regular Member
Join Date: Mar 2007
Location: Melbourne
Posts: 135
|
Quote:
If you (or someone) can tell me the correct width that the 9" in the XB should be then I can measure mine up tonight & confirm 100% for you
__________________
4.2 Supercharged V8 RangeRover Sport - Daily driver 1975 XB Fairmont GS Coupe - Ford Weekend Toy 1975 XB Falcon 500 Coupe - Undecided Project 1972 Dodge Challenger R/T - Mopar Weekend Toy 1969 GTO - Pontiac Weekend Toy |
|||
|
|
|
|
04-08-2016, 11:22 AM
|
#108 | |||
|
Moderator Ford Coupe Club

Join Date: Dec 2004
Location: Vic
Posts: 3,905
|
Quote:
Tyres are like clothing, the physical size of the tyre varies by brand with the same nominal size.
__________________
Mitsubishi ASX Auto, White - Daily Commuter XC Fairmont Coupe, 351 4spd, Graphite Grey - The Antidote http://www.fordcoupeclub.org "If you don't know where you're going, any road will take you there" George Harrison 2001. |
|||
|
|
|
|
04-08-2016, 12:04 PM
|
#109 | |||
|
WT GT
Join Date: Jan 2006
Location: The GSS
Posts: 17,599
|
Quote:
I'm quite annoyed that Challenger made such a pointless offset in the first place. But they're out of business now so... |
|||
|
|
|
|
04-08-2016, 12:05 PM
|
#110 | |||
|
WT GT
Join Date: Jan 2006
Location: The GSS
Posts: 17,599
|
Quote:
|
|||
|
|
|
|
05-08-2016, 12:39 AM
|
#111 | ||
|
Regular Member
Join Date: Mar 2007
Location: Melbourne
Posts: 135
|
Ok, so I went out to measure the Diff tonight… now the only welds or joins on the tubes are these
 I’ve always assumed them to be the factory welds from when they joined the tubes to the pumpkin so I still don’t think my Diff has been shortened. Now as the Diff is still in the car I couldn’t stand it upright & measure its true length so my method was to measure from the back of the drum brake backing plate on one side to the back of the backing plate on the other   That gave a measurement of 55.5 inches… so since the backing plates are a little inboard of the true face of the diff tubes I’m guessing that my Diff is 56” long
__________________
4.2 Supercharged V8 RangeRover Sport - Daily driver 1975 XB Fairmont GS Coupe - Ford Weekend Toy 1975 XB Falcon 500 Coupe - Undecided Project 1972 Dodge Challenger R/T - Mopar Weekend Toy 1969 GTO - Pontiac Weekend Toy |
||
|
|
|
|
10-10-2016, 05:02 PM
|
#112 | ||
|
Regular Member
Join Date: Mar 2007
Location: Melbourne
Posts: 135
|
The correct RRS backing plate for the rear disk conversion arrived a few weeks ago now, so happy now that I have the correct bracket
 As the RRS steering rack required me to hack the end off my stock Steering column to modify it for use with the rack, I decided that I would get another steering column instead so that I could return the steering to stock if I ever needed too. So I decided to go for a fancy tilt column that is already converted for use with the rack, so this should just bolt in… the big difference is that it doesn’t house the ignition barrel in this column so I’ll need to decide where to relocate that too later   The new rear panel that fits across the rear behind the bumper is finished. It looks great & fits really well so very happy with that.    I still haven’t fully decided how I’m going to fix the chassis rails on this car yet, so I’ve decided to give myself as many options as I can to pick from, so on that line of thinking I ordered a set of Mustang rear chassis rails for the 67-73 body style…. Now as luck would have it Ford where very lazy back then & there is very little difference between the US Mustang rails & the Aussie Falcon rails, there are two extra bolt holes on the Mustang ones that are not needed on the XB just in front of the rear springe shackle & there are no holes for the XB tramp rods on the Mustang rails & the very ends of the XB rails flange outward vs an inward flange on the Mustang, but all in all they are so close it’s not funny    Now the options I have available are: Leave them badly repaired as they are Try & heat & pull them back into proper length Replace the worst sections using sections of Mustang rail Replace them with the complete Mustang rail Replace them with the complete rails off my spare XB shell (which are in great condition)
__________________
4.2 Supercharged V8 RangeRover Sport - Daily driver 1975 XB Fairmont GS Coupe - Ford Weekend Toy 1975 XB Falcon 500 Coupe - Undecided Project 1972 Dodge Challenger R/T - Mopar Weekend Toy 1969 GTO - Pontiac Weekend Toy |
||
|
|
|
|
10-10-2016, 05:03 PM
|
#113 | ||
|
Regular Member
Join Date: Mar 2007
Location: Melbourne
Posts: 135
|
Next job is to remove the diff from the car, for two reasons.. one so that I can get better access to the rails to work out what to & then to actually do it & secondly so that I can send the diff away to be worked on & toughened up so that it can take the torque of the new engine.
Top tech tip here, it’s super easy to remove the diff if you cut the back off your car first…. See you don’t get tips like that from those US restoration shows now do ya…  Should be simple enough, unbolt the brake lines from the diff where connector block mounts  Then unbolt the shock, the sway bar & the tramp rod from where they connect to the car  Getting the tramp rod nut off was hard work, the bolt was worn smooth from years of rubbing on the chassis rail  With all of that undone I just undid the rear shackles & let the diff sit on the wheels pivoting from the front spring perches  Pop those two bolts out & then just wheel the diff back out of the way    Last job of the day was to strip everything off the diff that wasn’t going to be needed anymore   Now I just need to make some final decisions as to which way I go fixing the rear rails & the rear Qtrs.. The plan is still to get this car to Hardtop Anniversary in Bathurst next year.. so I need to pull my finger out & spend some long nights in the shed, all of this body work has to be finished by Xmas… a tall order but I need to set myself a deadline.
__________________
4.2 Supercharged V8 RangeRover Sport - Daily driver 1975 XB Fairmont GS Coupe - Ford Weekend Toy 1975 XB Falcon 500 Coupe - Undecided Project 1972 Dodge Challenger R/T - Mopar Weekend Toy 1969 GTO - Pontiac Weekend Toy |
||
|
|
|
| 7 users like this post: |
|
10-02-2019, 09:23 AM
|
#114 | ||
|
Regular Member
Join Date: Feb 2006
Location: Perth WA
Posts: 80
|
Anyone know what happened with this project?
Interested in the chassis rail outcome. Russell.
__________________
1973 XAGT Coupe T B T B , , 1974 XBGT Sedan T B B M, 2011 Territory Titanium TDCi, 2014 Ford Ranger XLS 4x4 Dual cab 3.2TD 6 speed auto, 1974 XBGS Coupe Y L P 2 |
||
|
|
|
|
02-05-2021, 11:36 PM
|
#115 | ||
|
Regular Member
Join Date: Mar 2007
Location: Melbourne
Posts: 135
|
Sorry... I haven't been on this site in years... the XB is coming along nicely & is currently getting painted.
I could have used the Mustang rails they did line up close enough that with a little modification they would have been fine. I got a set of non-bent XB coupe rails & they are what I used in the end.
__________________
4.2 Supercharged V8 RangeRover Sport - Daily driver 1975 XB Fairmont GS Coupe - Ford Weekend Toy 1975 XB Falcon 500 Coupe - Undecided Project 1972 Dodge Challenger R/T - Mopar Weekend Toy 1969 GTO - Pontiac Weekend Toy |
||
|
|
|
| 6 users like this post: |
|
07-05-2021, 04:14 PM
|
#116 | |||
|
Starter Motor
Join Date: Mar 2017
Posts: 1
|
Quote:
|
|||
|
|
|
|
| Thread Tools | |
| Display Modes | |
|
|


 Linear Mode
